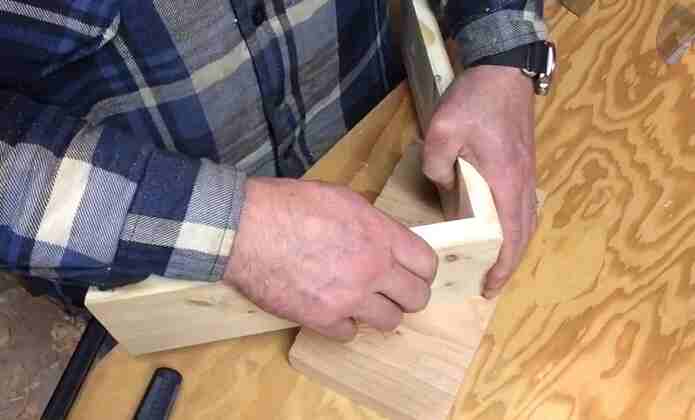
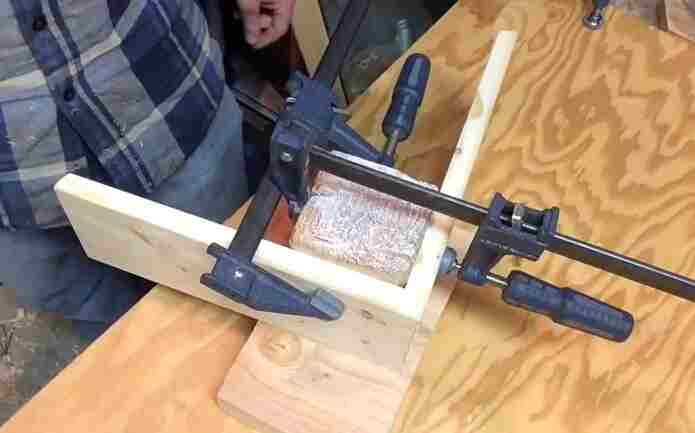
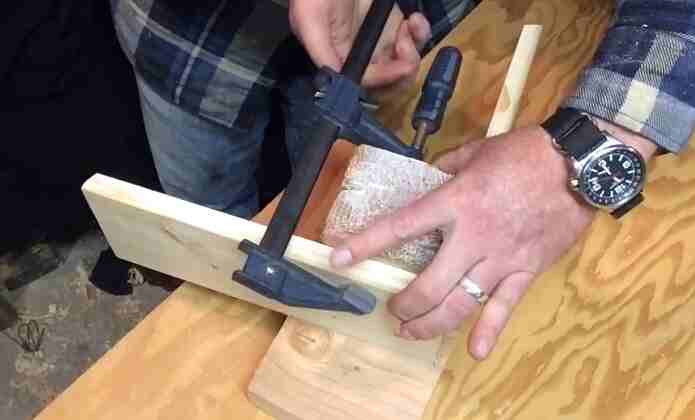
To clamp a corner, align the pieces precisely, apply wood glue, and use a corner clamp to hold them together securely. Tighten the clamp until the glue sets, ensuring a strong and accurate bond.
In the realm of woodworking, mastering the art of clamping is essential, especially when it comes to tackling tricky corners. For beginners navigating the labyrinth of tools and techniques, understanding how to effectively clamp a corner is a crucial foundational skill. This blog post unveils the key steps and insights to empower novices with the confidence to secure corners seamlessly, ensuring their woodworking endeavors start on a sturdy and successful foundation.

When it comes to woodworking, one of the most important aspects is ensuring that your corners are clamped effectively. There are a few reasons why this is the case, which I will explore in depth below.
- When clamping corners effectively, you create a stronger and more secure connection between two pieces of wood. This is because the clamps evenly distribute the pressure across the entire wood surface instead of just concentrating it in one spot. This results in a stronger overall bond between the two pieces of wood.
- Clamping corners effectively can also help to prevent warping. This is because the clamps help to keep the wood in place while it dries, which prevents it from shrinking or expanding unevenly.
- Clamping corners effectively can also help to protect your workpiece from damage. This is because the clamps help to keep the wood in place, which prevents it from being chipped or scratched.
- Clamping corners effectively can also help to improve the overall appearance of your project. This is because the clamps help to keep the wood in place, which prevents it from looking uneven or sloppy.
- Finally, clamping corners effectively can also help to save you time and money. This is because the clamps help keep the wood in place, which prevents you from sanding or landing it down later.
Overall, clamping corners effectively is integral to getting a high-quality finish on your projects.
What are some of the challenges you face when clamping a corner?
When clamping a corner, some of the challenges you face include the following:
1. Selecting the right clamps:
There are many types of clamps available on the market, so it can be tricky to select the right ones for your project. You'll need to consider the size and shape of your project and the material you're working with.
2. Clamping evenly:
It's important to clamp the pieces of your project evenly to bond together correctly. Otherwise, you may end up with a weak or uneven joint.
3. Avoid glue squeeze-out:
When working with glue, it's essential to avoid getting any on the surface of your project. Otherwise, it will be visible when you're finished.
Related: Glue Clamping Time: How Long Does it Take?
4. Getting a tight fit:
Getting a strong bond is crucial to get a tight fit between the two pieces you're joining. This can be tricky, especially with irregularly shaped pieces.
5. Removing clamps:
Once the glue has dried, you'll need to remove the clamps. This can be not easy, especially if they're tight. You may need a clamp removal tool or a saw to cut the clamps off.
How to clamp a corner?
If you're working with wood, you'll need to know how to clamp a corner at some point. Clamping is essential to many woodworking projects, and it's not always easy to get the hang of it. This guide will show you how to clamp a corner step by step to get the job done right.
1. Choose the right clamps.
There are many types of clamps, each with its advantages and disadvantages. For most projects, you'll want to use F-style clamps or C-clamps. These are the easiest to use and will give you the best results.
Related: Choosing the right bar clamps
2. Measure the wood.
Before you clamp anything, you must ensure that your clamps will be the right size for the job. Measure the width of the wood you're working with, and then add a few inches to account for the thickness of the clamps.
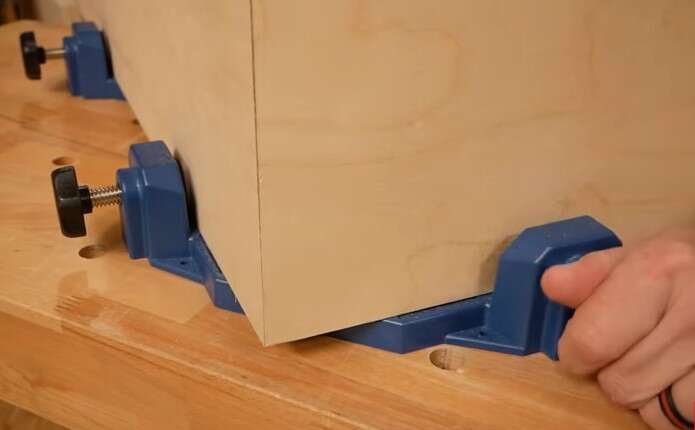
3. Place the clamps on the wood.
Once you've chosen the right clamps and measured the wood, it's time to start clamping. Place the clamps on either side of the corner you're working with, making sure they're parallel.
Related: Clamping 22.5 Degree Angles: How Do You Do It?
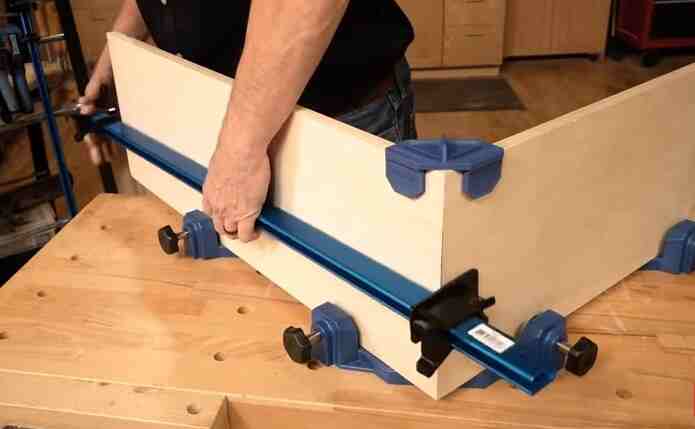
4. Tighten the clamps.
Once the clamps are in place, you'll need to tighten them. You'll want to use about 30 pounds of pressure for most projects. This will hold the wood securely in place while you work.
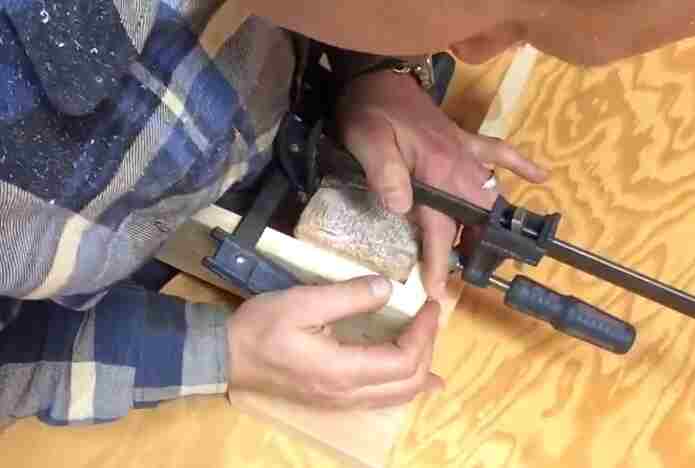
5. Do your work.
With the clamps in place, you can now do the work you need to do. Whether sanding, sawing, or drilling, the clamps will hold the wood steady to get a good result.
6. Remove the clamps.
When you finish your project, it's time to remove the clamps. Be careful not to damage the wood as you remove the clamps. Once they're off, you can put your project away until next time.
Clamping is an essential part of woodworking, and it's not always easy to get the hang of it. This guide will show you how to clamp a corner step by step to get the job done right. With these tips, you'll be able to clamp like a pro in no time.
Watch out for the video on how to clamp a corner:
What are the benefits of clamping a corner?
When you clamp a corner, you're essentially creating a 90-degree angle. This is useful for various tasks, including woodworking, metalworking, and even simple home repairs. Clamping a corner can make your work easier and more accurate.
There are several benefits to clamping a corner:
1. It creates a stable work surface.
When you clamp a corner, you're essentially creating a 90-degree angle. This is a more stable surface to work on than a flat surface. This is especially important when working with power tools or delicate materials.
2. It makes your work more accurate.
When you have a stable work surface, you can be more precise with your cuts and measurements. This is essential for tasks like woodworking, where even a small mistake can ruin your project.
3. It saves time.
It can take longer to complete your task if you constantly have to adjust your materials or position them on an unstable surface. Clamping a corner will save you time in the long run.
4. It prevents damage.
An unstable work surface can cause your materials to shift or move around. This can damage your materials or even cause them to break. Clamping a corner will keep your materials in place and prevent them from being damaged.
5. It's easy to do.
Clamping a corner is a relatively simple task. You don't need any special skills or knowledge to do it. All you need is a few supplies and a little bit of time.
If you're looking for an easy way to improve the stability and accuracy of your work, clamping a corner is the way to go. With just a few supplies and some time, you can reap the benefits of this simple task.
How do you know if you’ve clamped a corner correctly?
When clamping a corner, there are three things to look for to be sure you have it clamped correctly: a consistent 90 degree angle, flush surfaces, and adequate pressure.
A consistent 90 degree angle is key to ensuring that the corner is properly clamped. To check for a consistent angle, use a square or triangle to measure the corners of the wood. If they do not match up at a 90 degree angle, adjust the clamps until they do. Make sure that all four corners are measured and adjusted equally so that the surface is flush.
Finally, apply adequate pressure by tightening the clamps until you see slight indentations in the wood. Do not over-tighten, as this can cause damage to the wood. If the clamps are not tightened enough, the wood will not be held in place correctly and may move during the gluing process.
Tips for clamping a corner
To ensure accurate and secure joints, clamping a corner can be essential in woodworking, carpentry, and various DIY projects. Here are some tips for effectively clamping a corner:
1. Choose the Right Clamps:
Use corner clamps designed to hold two workpieces at a 90-degree angle. Consider other types of clamps, such as bar clamps, C-clamps, or F-clamps, if they are more suitable for your project.
2. Prepare the Workpieces:
Ensure the workpieces you want to clamp together are correctly sized, squared, and aligned before applying clamps.
3. Mark the Corners:
Use a pencil or marking gauge to mark the exact corners of the joint. This will help you align the clamps accurately.
4. Apply Even Pressure:
When using corner clamps or other clamping tools, apply even pressure on both workpieces to prevent them from shifting during clamping. Tighten the clamps gradually and evenly to avoid creating gaps in the joint.
5. Check for Squareness:
Use a carpenter's square or a framing square to check if the joint is perfectly square before the glue dries. Adjust the clamps if necessary.
6. Protect the Wood:
Place softwood or felt pads between the clamps and the workpieces to prevent marring or denting the wood surface.
7. Consider glue:
If you're joining the pieces with glue, apply a suitable woodworking adhesive to the joint surfaces before clamping. Follow the manufacturer's instructions for the specific glue you're using.
8. Use Backing Blocks:
For larger or heavier projects, consider using backing blocks on the opposite side of the joint. These blocks can help distribute the clamping pressure evenly and prevent the wood from bowing or warping.
9. Be Patient:
Allow the glue to fully cure before removing the clamps. This can take several hours or even overnight, depending on the type of glue used.
10. Test Fit:
Before applying glue and clamping, perform a dry fit to ensure the pieces fit together perfectly. Make any necessary adjustments or corrections before the final assembly.
11. Clean Excess Glue:
After clamping, wipe away any excess glue from the joint using a damp cloth or sponge. This will prevent hardened glue from marring the wood.
12. Safety First:
Be cautious when tightening clamps to avoid over-tightening, which could damage the wood or clamps.
13. Plan:
Plan your clamping strategy, especially for complex projects with multiple joints, to ensure you have enough clamps and space to work effectively.
Remember that the specific method and tools you use for clamping a corner may vary depending on the project's size and complexity. Always follow safety precautions and manufacturer guidelines when using clamps and other tools.
Final Words
Now that you know how to clamp a corner, there's no excuse for not taking on that woodworking project you've been putting off. With the help of these tips, you'll be cranking out perfectly clamped corners in no time - so get to it!