To clamp 22.5-degree angles, use a miter saw with a preset stop at 22.5 degrees. Secure your workpiece firmly, align the cut line with the saw blade, and make the cut. Double-check measurements for accuracy.
Embarking on the journey of woodworking? Understanding the intricacies of angles is crucial. Among them, the elusive 22.5-degree angle can be a head-scratcher for beginners. Fear not! In this guide, we demystify the art of clamping 22.5-degree angles. Whether you're crafting furniture or tackling DIY projects, mastering this angle opens doors to precision in your creations. Let's dive into the basics and unravel the secrets of securing these angles with confidence.

When clamping a 22.5 degree angle, some of the challenges that you may face include the following:
1. Poor joint fit
The first challenge when clamping 22.5 degree angles is that the joint may not fit together snugly. This can be due to various reasons, such as an incorrect saw blade angle or inaccurate measurements. As a result, the joint may be weak and prone to coming apart.
2. Uneven clamping pressure
Another challenge is that it can be difficult to apply even clamping pressure when working with 22.5 degree angles. This is because the joint is not symmetrical, so one side may be tighter than the other. This can lead to uneven drying and warping of the wood.
3. Difficult cuts
Another challenge when clamping 22.5 degree angles is that the cuts can be more difficult. This is because the angle of the cut is not perpendicular to the grain of the wood, which can cause the saw blade to bind or slip.
4. Warped wood
Another challenge when clamping at 22.5 degree angles is that the wood may warp or cup due to the uneven drying caused by the clamping pressure. This can make it difficult to get a tight, clean joint.
5. Dimensional instability
Another challenge when clamping 22.5 degree angles is that the wood may be less stable dimensionally. This means that it is more likely to change shape over time, which can cause the joint to loosen or fail.
6. Limited applications
Finally, one of the challenges when clamping 22.5 degree angles is limited applications for this joint. This is because it is not as strong as other joints, such as miter or butt. As a result, it is not suitable for use in applications where high levels of stress are placed on the joint.
If you're facing any of these challenges, don't despair! You can overcome them with a bit of creativity and elbow grease.
Related: Is there a method for clamping large pieces of wood?
Pro Tip:
The use of multi-angle corner clamps can alleviate many challenges associated with clamping odd angles
How to clamp 22.5 degree angles?
Clamping two pieces of wood at a 22.5-degree angle can be tricky, but it's possible with the right tools and techniques. Here's a step-by-step guide on how to do it:
Materials and Tools You’ll Need:
- Two pieces of wood to be joined at a 22.5-degree angle.
- A protractor or angle measuring tool to measure and mark the angle accurately.
- A pencil or marking tool.
- A saw to cut the wood at the desired angle.
- Clamps to hold the pieces together while you work.
- Wood glue.
- Screwdriver and screws (optional for additional reinforcement).
Steps:
1. Measure and Mark the Angle:
Use the protractor or angle measuring tool to determine and mark a 22.5-degree angle on one end of each piece of wood. You can also create a template by drawing the angle on paper and transferring it to the wood.
2. Cut the Angles:
Carefully cut along the marked lines using a saw. Making precise cuts is crucial, so a miter saw or a miter box can benefit this task. Make sure the cuts are straight and accurate.
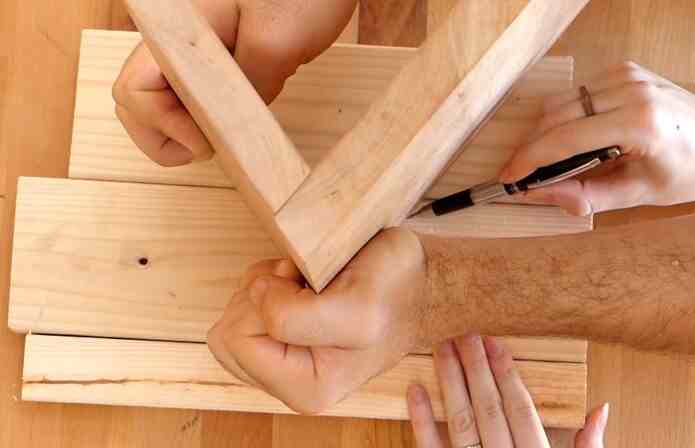
3. Dry Fit the Pieces:
Before applying any glue, do a dry fit by joining the two pieces together at the 22.5-degree angle to ensure they fit snugly and the joint aligns correctly. Make any necessary adjustments if the fit could be better.
4. Apply Wood Glue:
Once satisfied with the dry fit, apply a generous amount of wood glue to one of the mitered surfaces. Spread the glue evenly.
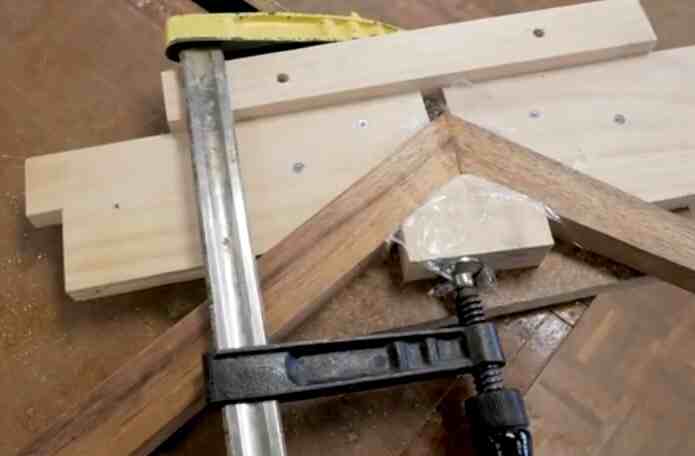
5. Clamp the Pieces Together:
Place the two mitered ends together to form the 22.5-degree angle. Use clamps to hold the pieces firmly in place. Ensure that the joint is aligned correctly and that no excess glue squeeze-out exists.
6. Wait for the Glue to Dry:
Follow the manufacturer's instructions for the wood glue you use regarding drying time. Typically, you should allow the glued joint to dry for at least a few hours or overnight for a strong bond.
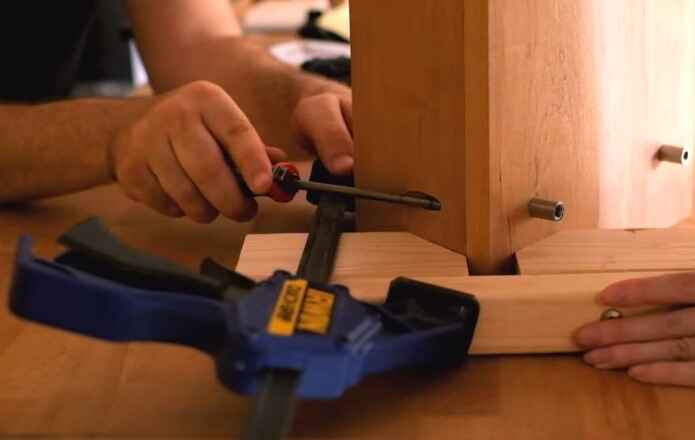
7. Optional: Reinforce with Screws:
For added strength, you can reinforce the joint with screws. Pre-drill pilot holes to prevent splitting and insert screws through one piece and into the other at the mitered joint. Be sure the screws don't protrude on the other side.
8. Sand and Finish:
After the glue has dried and any screws are in place, sand the joint and the surrounding wood to smooth out imperfections. Finish the wood with paint, stain, or a clear finish.
Remember to work carefully and precisely when cutting and gluing the wood to achieve a clean and strong joint at the 22.5-degree angle. Proper clamping and sufficient drying time for the glue are essential for a solid and durable connection.
Why is it so important to clamp 22.5 degree angles?
When it comes to carpentry, you have to take a lot of different angles into account. One of the most critical angles is the 22.5 degree angle. This is because if you don't clamp this angle correctly, it can result in a lot of problems down the line. Here are five reasons why it's so important to clamp a 22.5 degree angle:
1. It helps to create perfect corners.
When working with wood, it is essential to create perfect corners. If you do not clamp 22.5 degree angles, the corners of your project will not be as precise as they could be.
2. It gives you more control over your cuts.
If you are working with wood, you must completely control your cuts. When you clamp 22.5 degree angles, you can ensure that your cuts are perfectly straight and level. This will help you avoid any mistakes that could ruin your project.
3. It helps to prevent chipping.
When working with wood, it is crucial to prevent chipping. If you do not clamp 22.5 degree angles, the edges of your cuts can chip easily. This can ruin the appearance of your project and make it more difficult to work with.
4. It helps to create clean cuts.
When working with wood, it is essential to create clean cuts. If you do not clamp 22.5 degree angles, the edges of your cuts will be very jagged and uneven. This can make your project look sloppy and unfinished.
5. It is safer.
Using a 22.5 degree angle is also much safer than other clamping methods. This is because it gives you more control and stability while working.
6. It is more efficient.
Clamping at a 22.5 degree angle is also more efficient than other methods. This is because it takes less time to set up, and you can get more done in a shorter period.
7. It helps to achieve a professional finish.
When working with wood, it is vital to achieving a professional finish. If you do not clamp 22.5 degree angles, the edges of your project will not be as smooth and polished as they could be. This can give your project an amateurish appearance.
How do you know if you’ve clamped a 22.5 degree angle correctly?
There are several ways to check if you've clamped a 22.5 degree angle correctly. A simple way is to use a protractor and measure the angle between the two boards. If it matches 22.5 degrees, you have correctly clamped the boards. Using a square or ruler, you can also measure the distance between the edge of the board and the center of the clamp. If this distance equals half the width of the board, you have clamped it at the correct angle.
Tips for clamping a 22.5 degree angles
Clamping two pieces of wood at a 22.5-degree angle can be tricky, especially if you want a precise and secure joint. Here are some tips to help you achieve a successful angle clamping:
1. Accurate Measurement:
Start by measuring and marking the 22.5-degree angle on both pieces of wood. To ensure accuracy, you can use a protractor, a miter gauge, or a digital angle finder. Double-check your measurements to avoid errors.
2. Use a Miter Saw:
A miter saw is an excellent tool for precise angled cuts. Set the miter saw to a 22.5-degree angle and cut each piece of wood accordingly. Make sure the cuts are clean and square.
3. Test Fit:
Before applying any glue or clamps, do a dry-fit to ensure the two pieces of wood match up perfectly at the desired angle. Make any necessary adjustments if the fit needs to be tight and flush.
4. Glue Selection:
Choose a good-quality wood glue with a strong bond. Apply a thin, even layer of glue to both mating surfaces, ensuring complete coverage. Wood glue typically needs some clamping pressure to work effectively.
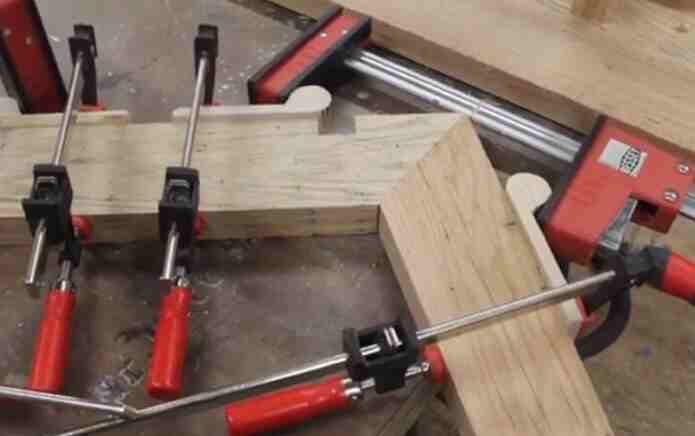
5. Clamping Strategy:
Use clamps designed for angle joints, such as corner or adjustable miter clamps. These specialized clamps are designed to hold pieces together at various angles.
6. Even Pressure:
Apply even pressure across the joint to prevent any gaps or misalignment. Adjust the clamps as needed to ensure the joint is flush and snug. Be careful not to over-tighten and squeeze out too much glue.
7. Scrap Wood Protection:
To prevent damage to your project piece, use small strips of scrap wood or cardboard between the clamp jaws and the workpiece. This will distribute the clamping pressure more evenly and protect the wood from clamp marks.
8. Wait for Drying:
Follow the glue manufacturer's instructions regarding drying time. You must leave the clamped joint undisturbed for several hours or overnight to ensure a strong bond.
9. Cleanup:
Remove any excess glue squeeze-out immediately with a damp cloth or sponge. It's much easier to clean up while the glue is still wet.
10. Reinforcement:
Depending on the project, you may consider reinforcing the joint with screws or dowels for added strength.
Remember that practice makes perfect when it comes to woodworking, especially with angled joints. Take your time and be patient, as achieving a precise 22.5-degree angle can be challenging, but with the right tools and techniques, you can create strong, accurate joints.
Final Words
Now that you know how to clamp 22.5 degree angles put your new skills to the test! Use these tips and tricks to achieve perfect angles every time. With a little practice, you'll be a pro in no time. Thanks for reading, and happy woodworking!