A bar clamp in woodworking is a versatile tool used to secure and hold together wood pieces during gluing or assembly. It provides even pressure, ensuring a strong bond and precise alignment in various woodworking projects.
Understanding the tools at your disposal is key, and the bar clamp is a must-have for any aspiring woodworker. In this beginner-friendly guide, we'll unravel the mysteries of the bar clamp, shedding light on its versatile uses in woodworking. From securing pieces for glue-ups to providing stability during intricate projects, discover how this indispensable tool plays a crucial role in elevating your woodworking skills. Let's dive into the world of bar clamps and unlock their potential in crafting beautiful, sturdy wood creations.

Yes, bar clamps are an essential woodworking tool. They hold boards and panels together while you glue and screw them in place. Additionally, they can be used as a vise for clamping down workpieces for routing, sanding, and more.
There are many types of bar clamps on the market, so selecting the right type for the job is essential. For example, if you need a lot of clamping force, you'll want to use a C-clamp or pipe clamp. But if you only need light pressure or want to avoid marring the surface of your workpiece, then a spring clamp would be a better option.
What are bar clamps used for in woodworking?

Bar clamps are an incredibly versatile tool that can be used for various woodworking applications. Here are twelve of the most common uses for bar clamps in woodworking:
1. Gluing boards together:
When gluing boards together, bar clamps can apply even pressure along the entire length of the boards, ensuring a strong bond.
2. Clamping miter joints:
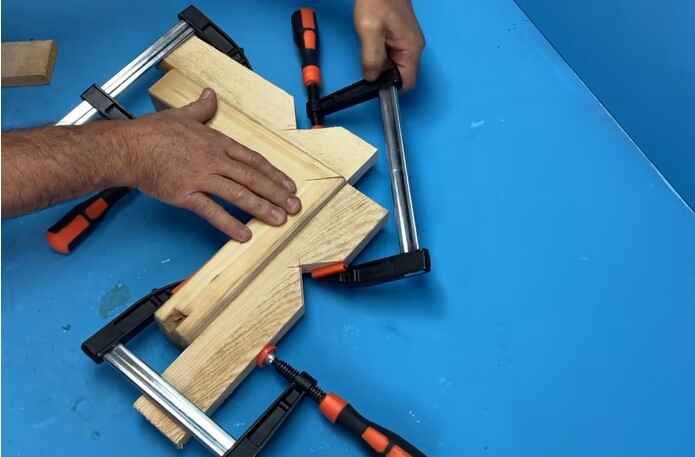
Miter joints are commonly used in woodworking, and bar clamps can hold the pieces together while the glue dries.
3. Clamping miters for cutting:
When cutting miters, bar clamps can be used to hold the workpiece in place, ensuring a clean, precise cut.
4. Assembly of cabinets:
Bar clamps are often used in the assembly of cabinets, as they can clamp the cabinet sides together while the glue dries.
5. Attaching cabinet doors:
Cabinet doors can also be attached using bar clamps, holding the door in place while the screws or nails are being driven.
6. Building frames:
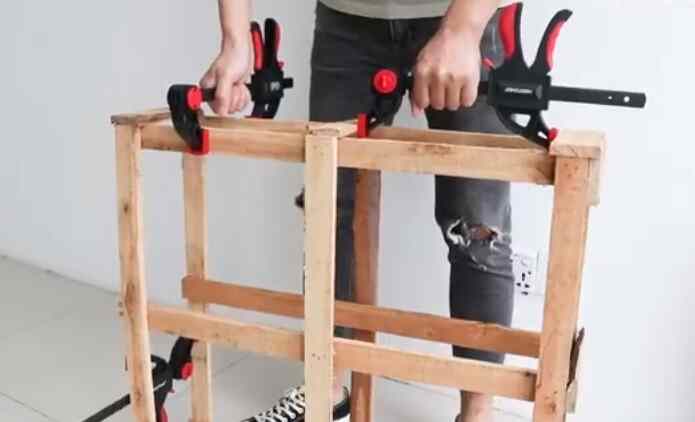
Frames can be built using bar clamps by joining the pieces together and clamping them until the glue has dried.
7. Building boxes:
Boxes can also be built using bar clamps, which can clamp the sides of the box together while the glue dries.
Related: Clamping Perpendicular Wood: How Do I Do It?
8. Clamping molding:
Molding can be attached to surfaces using bar clamps, and they can hold the molding in place while the adhesive dries.
9. Edge joining:
Bar clamps can be used to join boards together by their edges, and they can apply even pressure along the length of the boards.
10. Laminating:
Laminating involves bonding two or more layers of material together, and bar clamps can apply pressure to the layers while the adhesive dries.
11. Mortising:
Mortising is a woodworking technique that involves cutting recesses into surfaces, and bar clamps can hold the workpiece in place while the mortise is being cut.
12. Router work:
When using a router, bar clamps can hold the workpiece in place, ensuring a precise, clean cut.
Bar clamps are an essential tool for any woodworker and can be used for various applications. By understanding the different uses of bar clamps, you can ensure that you always have the right tool for the job.
What are some of the benefits of using bar clamps in woodworking?

There are many benefits of using bar clamps in woodworking. Here are just a few:
1. Increased accuracy:
Bar clamps can help ensure a tight, even fit when gluing or attaching two pieces of wood together. This is especially important for delicate or difficult projects where a precise fit is essential.
2. Greater stability:
Unlike hand-held clamps, which can slip or move out of position, bar clamps provide a more stable hold. This is essential for ensuring that your project turns out exactly as planned.
3. More versatility:
Bar clamps come in various sizes and styles, making them ideal for a wide range of woodworking projects. Whether you're working on a small repair or a large piece of furniture, a bar clamp is perfect for the job.
4. Faster results:
With their increased stability and precision, bar clamps can help you complete your project more quickly and efficiently.
5. Easy to use:
Bar clamps are simple, even for beginners. You can start your next woodworking project with just a few basic steps.
6. Safe:
When used correctly, bar clamps are safe for both you and your project. This is especially important when working with power tools or other dangerous equipment.
7. Affordable:
Bar clamps are affordable for woodworkers of all levels. Whether you're just starting or working with wood for years, bar clamps are a great addition to your toolkit.
Whether a beginner or a seasoned pro, bar clamps can help you create better, faster results in your woodworking projects. With their increased accuracy, stability, and versatility, bar clamps are an essential tool for any woodworker.
Tips on how to get the most out of bar clamps in woodworking?

Woodworking is a fun and rewarding hobby, but it can be challenging if you don't have the right tools. One essential tool for any woodworker is a bar clamp. Bar clamps come in various sizes and styles, so it's necessary to choose the right one for your needs. Here are seven tips to help you get the most out of your bar clamps:
1. Quality Matters
There are a lot of bar clamps on the market, but not all are created equal. When it comes to woodworking, you want to ensure you're using the best tools possible, including bar clamps. Look for clamps made from high-quality materials, such as aluminum or steel. In addition, make sure the clamp you choose has a comfortable grip and is easy to use.
2. Use the Right Size Clamp
When it comes to bar clamps, size does matter. You'll want to ensure you're using the right size clamp for the job. You won't need a large clamp if you're working on a small project, such as a picture frame. Conversely, if you're working on a larger project, such as a piece of furniture, you'll need a bigger clamp. Choose the right size clamp for the job, and you'll be much happier with the results.
3. Know Your Clamping Needs
Before using bar clamps, it's essential to know your clamping needs. For instance, do you need a light-duty or heavy-duty clamp? Do you need a one-handed or two-handed clamp? Once you know your specific clamping needs, choosing the right bar clamp for the job will be much easier.
4. Consider the Jaw Type
There are two main types of jaws for bar clamps: flat and pipe. Flat jaws are great for holding flat pieces of wood, while pipe jaws are better suited for holding round or irregularly shaped objects. Choose the jaw type that best suits your needs.
5. Use Caution when Applying pressure
When using a bar clamp, caution is essential when applying pressure. If you apply too much pressure, you risk damaging the wood or causing the clamp to slip. Start with light pressure and increase the pressure gradually until you reach the desired level.
6. Pay Attention to Your Surroundings
When using bar clamps, paying attention to your surroundings is important. Make sure there are no loose objects nearby that could get caught in the clamp or cause the clamp to slip. In addition, make sure you're not applying too much pressure, as this could damage your workpiece.
7. Use Protective Gear
When using bar clamps, it's important to wear protective gear. This includes gloves, safety glasses, and a dust mask. Wearing protective gear will help keep you safe while you're working.
Bar clamps are a great addition to any woodworker's toolkit. When used properly, they can help you complete a wide variety of projects. Keep these tips in mind, and you'll be able to get the most out of your bar clamps.
Final Words
So there you have everything you need to know about bar clamps! Now that you know all the different ways you can use them put your new knowledge to the test and get clamping. And if you're looking for even more inspiration, check out my blog post on woodworking projects that will upgrade your DIY game.