Knowing how to use a belt sander effectively is a valuable skill for any DIY enthusiast or professional woodworker. This versatile power tool can make the task of sanding and smoothing various surfaces significantly easier and more efficient. Whether you're refinishing furniture, shaping wooden pieces, or tackling home improvement projects, understanding the ins and outs of a belt sander can help you achieve professional-quality results.
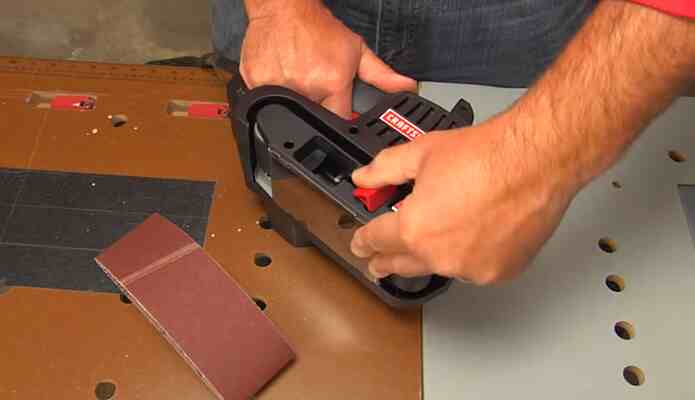
A belt sander is a powerful handheld or stationary tool designed for sanding and shaping a variety of materials, with wood being the most common. It consists of a continuous loop of sandpaper (the "belt") that rotates around two drums powered by a motor. Belt sanders are available in different sizes and types, each catering to specific applications and user preferences.
Safety Precautions
A. Personal protective equipment (PPE)
- Safety goggles: Safety goggles are a non-negotiable safety item when using a belt sander. They protect your eyes from flying debris and dust generated during the sanding process. Ensure they fit snugly and provide adequate coverage.
- Ear protection: The high noise level generated by a belt sander can be harmful to your hearing. Invest in quality ear protection, such as earmuffs or earplugs, to safeguard your hearing while working with this tool.
- Dust mask: A dust mask is essential to prevent the inhalation of fine dust particles produced during sanding. Choose a mask rated for woodworking and ensure a proper fit to keep your respiratory system safe.
B. Workspace setup
- Adequate lighting: Proper lighting is crucial for precision and safety. Ensure your workspace is well-lit so you can see your work clearly and avoid accidents.
- Stable work surface: Before you start sanding, ensure your workpiece is firmly secured on a stable surface, such as a workbench or sawhorse. A wobbly workpiece can lead to uneven sanding and potential injuries.
C. Machine-specific safety tips
- Checking the machine for defects: Before every use, inspect the belt sander for any defects, loose parts, or damage. Ensure that the sanding belt is properly aligned and tensioned. Never operate a faulty or damaged machine.
- Proper handling of the power cord: Keep the power cord away from the sanding area to prevent accidental entanglement. Use an extension cord suitable for your machine's power requirements and in good condition.
Understanding Your Belt Sander
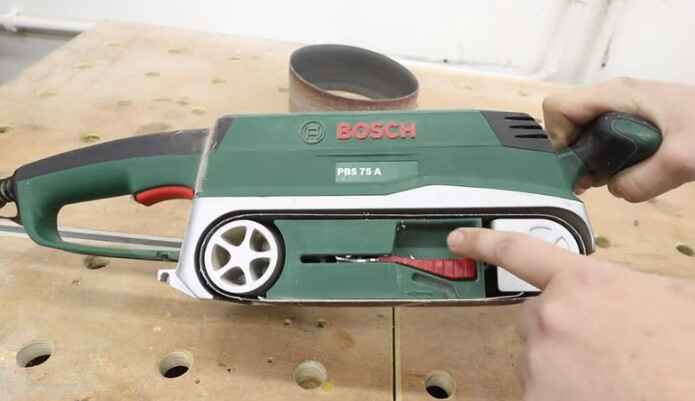
A. Components of a belt sander
- Belt: The sanding belt is the heart of the belt sander. It wraps around two cylindrical drums and is responsible for removing material from the workpiece. Understanding how to maintain and replace the belt is crucial for efficient sanding.
- Motor: The motor powers the sanding belt and determines the sander's speed and power. Different models may have varying motor capacities, so choose one that suits your project's requirements.
- Tension release lever: The tension release lever allows you to change and adjust the sanding belt easily. Proper tensioning ensures optimal sanding performance.
B. Types of belt sanders
- Handheld: Handheld belt sanders are portable and ideal for smaller projects or tasks that require precision. They are versatile and easy to control, making them a popular choice among DIYers.
- Stationary: Stationary belt sanders are larger, more powerful machines often used in professional workshops. They are designed for heavy-duty tasks and can handle larger workpieces with ease.
C. Choosing the right sandpaper grit
Selecting the appropriate sandpaper grit is essential for achieving the desired finish. Coarse grits (lower numbers) are suitable for material removal, while finer grits (higher numbers) are used for finishing and smoothing surfaces. Understanding this aspect of sandpaper selection is key to successful sanding.
Preparing Your Workpiece
A. Material selection
Before you start sanding, consider the type of material you're working with. Different materials, such as wood, metal, or plastic, may require specific techniques and grits of sandpaper.
B. Marking the sanding area
Marking the area to be sanded helps ensure that you stay on track and avoid over-sanding or uneven results. Use a pencil or masking tape to define the sanding zone.
C. Securing the workpiece
Properly securing your workpiece is crucial for safe and effective sanding. Use clamps or a vice to hold it securely in place, ensuring it won't move or slip during the sanding process.
SECRET!
The key to mastering a belt sander's power is gentle control. Start with a low grit to remove material, then gradually increase grit for a smooth finish. Always move the sander with the wood's grain, applying even pressure, and avoid lingering in one spot to prevent over-sanding.
Operating the Belt Sander
A. Starting the machine
Before turning on the belt sander, make sure it is on a stable surface and properly secured. If you're using a handheld model, grasp it firmly with both hands and ensure your fingers are clear of the sanding belt's path. Gradually increase the speed and let the machine reach its full operating speed before making contact with the workpiece.
B. Maintaining a consistent speed and pressure
Maintaining a consistent speed and pressure while sanding is crucial for achieving uniform results. Avoid applying excessive pressure, as this can cause gouges or uneven sanding. Let the weight of the sander do the work.
C. Sanding techniques
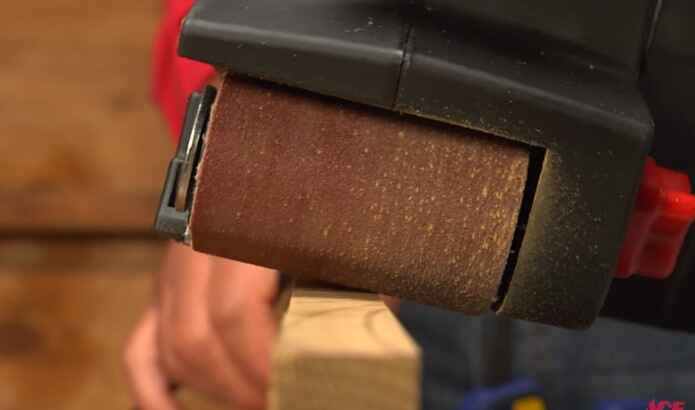
- Edge sanding: When sanding edges, move the sander in the direction of the wood grain to avoid creating scratches or rough spots. Be cautious near corners and edges to prevent over-sanding.
- Surface sanding: For flat surfaces, use long, even strokes, overlapping each pass slightly. Keep the sander moving to prevent uneven sanding.
- Corner sanding: Sanding corners require special attention. Be gentle to avoid rounding edges, and work with the grain to maintain a smooth finish.
D. Avoiding common mistakes
- Over-sanding: Over-sanding can result in material removal beyond your intended depth. To prevent this, periodically check your progress and avoid excessive passes in one area.
- Sanding against the grain: Sanding against the grain can cause tear-out and leave an uneven surface. Always sand with the grain for a smoother finish.
- Leaving gouges or uneven spots: Careless or uneven pressure can lead to gouges or uneven spots on your workpiece. Maintain consistent pressure and sand in a controlled manner to avoid this issue.
Changing the Sandpaper
A. power off and unplug the machine
Before changing the sandpaper, turn off the power and unplug the belt sander to prevent accidental starts.
B. Removing the old sandpaper
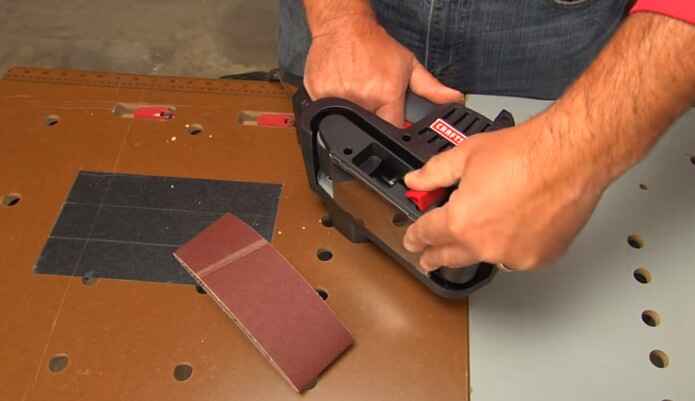
Follow the manufacturer's instructions to release the tension on the sanding belt and remove it. Dispose of old sandpaper properly.
C. Installing new sandpaper
Carefully install the new sandpaper according to the manufacturer's guidelines, making sure it is aligned and tensioned correctly.
D. Adjusting the tension
Proper tension is essential for efficient sanding. Follow the machine's instructions to adjust the tension as needed.
After-Use Maintenance
A. Cleaning the belt sander
After each use, clean the sander to remove dust and debris. Pay attention to the dust collection system, rollers, and vents. Regular maintenance ensures the longevity and performance of your machine.
B. Storing the machine properly
Store your belt sander in a dry, cool place, away from direct sunlight and extreme temperatures. Keep it out of reach of children and pets to prevent accidents.
C. Checking for wear and tear
Regularly inspect your belt sander for signs of wear, loose parts, or damage. Address any issues promptly to maintain safe and efficient operation.
Troubleshooting Common Issues
A. Belt tracking problems
If your sanding belt does not stay centered or continuously slips off the rollers, consult the user manual for instructions on adjusting the tracking mechanism.
B. Overheating
Overheating can occur with prolonged use. Allow the machine to cool down if it becomes excessively hot, and avoid overworking it.
C. Uneven sanding
Uneven sanding results from inconsistent pressure or improper technique. Practice and attention to detail will help you achieve more uniform results over time.
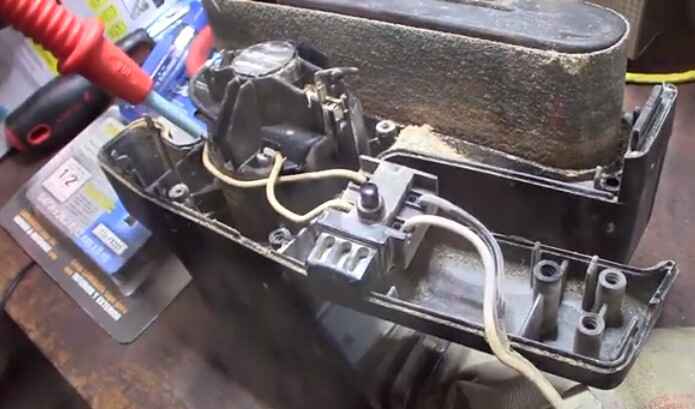
Tips for Using a Belt Sander
A belt sander is a versatile power tool commonly used for smoothing and shaping wood, metal, and other materials. When used correctly, it can be a valuable addition to your workshop arsenal. However, improper use can lead to accidents and subpar results. To help you make the most of your belt sander, here are 15 essential tips:
1. Safety First:
Before you start using a belt sander, prioritize safety. Wear safety goggles, hearing protection, and a dust mask to protect yourself from flying debris and dust. Avoid loose clothing, jewelry, or anything that could get caught in the sander.
2. Choose the Right Belt:
Select the appropriate sanding belt for your project. Different grits are suited for various tasks. Coarse grits (36-80) are ideal for heavy material removal, while finer grits (100-220) are better for finishing and smoothing.
3. Check the Tension:
Ensure the sanding belt is properly tensioned on the sander. A loose belt can slip or create uneven results, while an overly tight belt can damage the sander and decrease efficiency.
4. Align the Belt:
Make sure the sanding belt is aligned correctly with the sander's drum. Misalignment can lead to uneven sanding and may damage your workpiece or the sander itself.
5. Keep it Flat:
When using a belt sander, keep it flat on the work surface. Tilting it can cause gouges or uneven sanding. Apply even pressure across the entire surface for consistent results.
6. Start Slowly:
Begin sanding at a lower speed setting, especially if you're new to using a belt sander. Gradually increase the speed as you gain confidence and control over the tool.
7. Go with the Grain:
Always sand in the direction of the wood grain to avoid leaving noticeable scratches or swirl marks. Going against the grain can result in uneven and unattractive finishes.
8. Move Steadily:
Avoid dwelling in one spot for too long. Keep the sander moving at a steady pace to prevent over-sanding in certain areas, which can result in uneven surfaces.
9. Practice Control:
Maintain a firm grip on the sander with both hands. Use your dominant hand to guide the sander while the other hand stabilizes it. This will help you control the tool and achieve better results.
10. Edge Sanding:
When sanding edges, be cautious not to round them excessively. To avoid this, keep the sander moving and sand lightly to prevent overworking the edges.
11. Dust Extraction:
Connect a dust extractor or wear a dust mask to protect yourself from inhaling fine dust particles. Belt sanders generate a significant amount of dust, which can be harmful to your health.
12. Sand in Stages:
For optimal results, use progressively finer grits as you sand. Start with a coarser grit and work your way up to a finer one to achieve a smooth finish.
13. Don't Push Too Hard:
Let the sander's weight and the grit of the sandpaper do the work. Excessive pressure can cause the sander to bog down and damage the workpiece.
14. Check for Heat:
Periodically touch the workpiece to check for overheating. If it becomes too hot to touch, take a break to avoid warping or damaging the material.
15. Finish with Hand Sanding:
While a belt sander can remove material quickly, it may leave behind fine scratches. Finish your project with hand sanding using a finer grit to achieve a polished, smooth surface.
Using a belt sander can be a game-changer in your woodworking or DIY projects when done correctly. Follow these 15 tips to ensure safety, precision, and the best possible results. Remember that practice makes perfect, so take your time to develop your skills and gain confidence with this powerful tool.
How to Clean Belt Sander?
Cleaning a belt sander is essential to maintain its performance and prolong its lifespan. Over time, sawdust, debris, and other materials can accumulate in and around the sander, affecting its efficiency.
Here's a step-by-step guide on how to clean a belt sander:
Safety Precautions:
Before you start cleaning your belt sander, make sure to unplug it from the power source and remove the sanding belt.
Materials You’ll Need:
Compressed air or a shop vacuum with a nozzle attachment
- Soft brush or paintbrush
- Cleaning cloth or rag
- Mild detergent (optional)
- Water (if using detergent)
Cleaning Steps:
1. Clear the Work Area:
Ensure your workbench or workspace is clear of any obstacles and that there is good lighting to see what you are doing.
2. Remove the Sanding Belt:
Unplug the belt sander and remove the sanding belt by releasing the tension on the belt and sliding it off the rollers. Set the belt aside in a clean, dry area to prevent it from getting dirty.
3. Clean the Dust Collection Bag (If Applicable):
If your belt sander has a dust collection bag, remove it and empty the sawdust into a trash bag. You can use compressed air or a shop vacuum with a nozzle attachment to clean any remaining dust from the inside of the bag.
4. Use Compressed Air or a Shop Vacuum:
Blow compressed air or use a shop vacuum with a nozzle attachment to remove dust and debris from the sander's body, belt pulleys, and motor. Pay close attention to crevices and hard-to-reach areas.
5. Brush Away Residue:
Use a soft brush or paintbrush to gently remove any remaining dust and debris from the sander's components, including the drive rollers, tension adjustment mechanisms, and housing.
6. Wipe Down the Sander:
Dampen a clean cloth or rag with water (you can add mild detergent for stubborn grime) and wipe down the sander's exterior, removing any remaining dust or residue. Be sure to dry the sander thoroughly afterward.
7. Inspect the Sanding Belt:
While the sanding belt is removed, inspect it for signs of wear or damage. If it's worn out or damaged, replace it with a new one.
8. Reassemble the Sander:
Once everything is clean and dry, reassemble the sander, ensuring that the sanding belt is properly aligned and tensioned according to the manufacturer's instructions.
9. Test the Sander:
Plug in the sander and run it briefly without any material to ensure that it's working correctly.
10. Dispose of Waste Safely:
Dispose of any collected dust and debris in accordance with local regulations. Sawdust can be a fire hazard, so be sure to handle it safely.
Regularly cleaning your belt sander will help maintain its performance and extend its life. How often you clean it depends on how frequently you use the sander and the materials you're sanding, but it's a good practice to clean it after every significant project or when you notice a decrease in performance.
How to use a belt sander properly and correctly
To properly use a belt sander, follow these steps:
- Safety first: Wear safety goggles, a dust mask, and hearing protection. Ensure the sander is in good condition.
- Secure your workpiece: Clamp it down securely to prevent movement.
- Choose the right belt: Select the appropriate grit for your task, finer for finishing, and coarser for heavy material removal.
- Start slow: Turn on the sander and let it reach full speed before making contact with your workpiece.
- Steady motion: Keep a firm grip, moving the sander evenly across the material, following the grain if possible.
- Don't press too hard: Let the sander's weight do the work; excessive pressure can damage the wood.
- Finish with care: Use progressively finer grits for a smoother finish.
- Dust management: Clean up dust regularly to maintain visibility and protect your health.
Conclusion
Mastering the use of a belt sander is a valuable skill that can enhance your woodworking and DIY projects. Remember the following key points:
- Prioritize safety with proper PPE and workspace setup.
- Understand the components of your belt sander and select the right type for your needs.
- Choose the appropriate sandpaper grit for your project.
- Prepare your workpiece by selecting the right material and securing it properly.
- Operate the belt sander with consistent speed, pressure, and technique.
- Avoid common mistakes such as over-sanding, sanding against the grain, and leaving gouges.
- Perform after-use maintenance to keep your machine in top condition.
- Troubleshoot common issues to ensure smooth operation.
As with any skill, practice makes perfect. The more you use your belt sander, the better you'll become at achieving professional-level results. Be patient and persistent in honing your skills.
Lastly, never compromise on safety. Safety should always be your top priority when using a belt sander. Always wear the recommended PPE, follow safety guidelines, and exercise caution and care throughout your sanding projects. With the right knowledge and precautions, you can confidently harness the power of a belt sander for a wide range of woodworking and home improvement tasks.