Do your drywalls look like they need a refresh, but you don't know where to start? Don't worry - sanding and patching drywall is simpler than it sounds. Even if the thought of taking on this project makes you groan with dread, I'm here to tell you that with the right tools, preparation, and guidance from me, your drywall will be ready for its finishing coat faster than ever imagined. So get out your dust mask, and let's go!

- Drywall sander - Drywall sanders are a great way to get the job done. These tools have been specifically designed for this specific task, with various features that will make your projects easier and faster than ever before!
- Dust mask
- Mud pan
- Sanding pole
- Shop vacuum
- Stepladder
- Taping knife
Tips:
Drywall sanding generates fine dust particles that can be harmful if inhaled. Always wear a dust mask and eye protection, and ensure proper ventilation to minimize health risks.
Materials Required for Drywall Sanding
- 150-grit Drywall sandpaper
- Drop Cloths
- Hat
- Sanding sponges
- Window box fan
How to Sand Drywall? 8 Steps
It's a well-known fact that drywall is one of the most tedious jobs you can do in your house. It's also not for beginners, as it requires some serious know-how and skill to get right. But with the right tools and tips, sanding drywall is actually pretty easy! Here are 8 steps to make sure you have a smooth finish.
Step 1: Preparation for Drywall Sanding
Drywall sanding produces full measures of residue; however, appropriate readiness can help shield the waste from penetrating each niche and corner of your home. Before you start, gather all instruments in the room where you will sand, including additional joint compound and a clay blade to fill in any gouges or errors. Wear a residue veil and goggles to ensure your face; you might need to cover your hair with a scarf and wear old garments. On the off chance that you have an outside window, open it a split to give ventilation. Tape plastic sheeting over any entryways prompting different regions of your home, just as over the floor and any furniture in the room. To increase your sanding knowledge, read our article about hardwood floor sanding.
Step 2: Capture Dust: How to Capture Dust When Drywall Sanding?
Step 3: Try Fine Grit Sandpaper
Most pros get the most exceptional outcomes from 150 grit drywall sandpaper. The aperture on the drywall paper may give off an impression of being stopping up during use; however, drywall dust turns into an extra rough to both pounds and clean the binding outer part, yielding a softer finish, which expands the life of the sandpaper. Be that as it may, for more straightforward and faster sanding, you'll despite everything need to wash sandpaper bed covers often.
Step 4: Start the Sanding Work
Begin sanding the joints, creases, and around screws delicately with the sanding square. Read these 44 sanding tips to avoid mistakes.
Cautious to not squeeze the surface to abstain from "fluffing" the drywall or leaving sanding marks; sand the focal point of creases and joints sufficiently only to expel edges and knocks.
Additionally, abstain from sanding in an orderly fashion or going over a similar region a similar way, the two of which can leave furrows or sorrows. Instead, move the sander around in a bent movement.
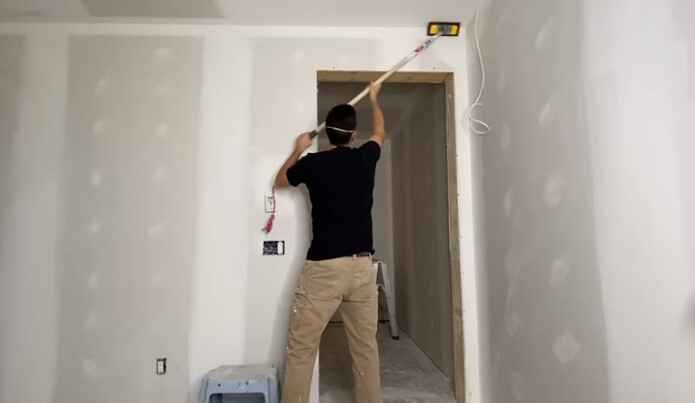
Step 5: Using Drywall Pole Sander
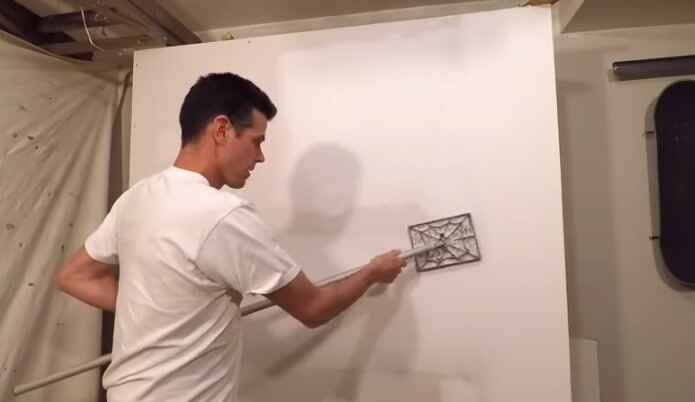
Utilize a convulse stroke with a Pole sander. Your shoulders may go to elastic; however, utilizing a pole sander is quicker and more straightforward.
Pole sanders are increasingly hard to run; use the convulse movement or a backward and forward clearing movement.
Contort the haft to sway a rotating appendage on the sanding top that will move the development of the forefront and permit the sander to both shift headings and pivot within corners where creases unit.
Turn the leader of the sander more extensive to work over creases or smaller to sand with latch strips.
Restrict hand and pole sanders to the "area" of divider or roof. On the off chance that you work excessively near inner corners, these instruments may pummel into neighboring dividers, scratching the completion.
The pole sander, with rotating appendage in the sander top, is inclined to turn over and cause harm.
Check out the video below to know the using of a pole sander:
Step 6: Sand with a Light Touch for Painting Prep
When you've done the central part of the drywall sanding, change gears and instruments to complete dubious "artfulness" regions like electric-powered outlets or lights and inner corners. If you want to pick a hand sander for artfulness work, you can; however, a superior decision around vents is handheld coarseness paper.
Use the sandpaper with an agreeable—a slight touch to abstain from scraping and grooving the area thoroughly. On the off chance that your sanding reveals and, at that point, rub tape, apply additional mire, plume out, let that soil dry and cautiously sand once more.
Step 7: Using a Sanding Sponge
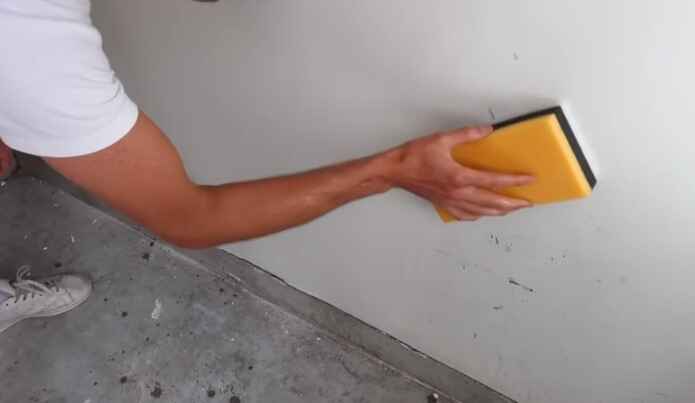
Hand sanders slog incredible on inner corners, and however while softening one part, you might wind up and over sand, the contrary part, cut a profound channel which will necessitate a clean up of mire to make it fix. Aside from that, utilize a fine-coarseness, calculated, dry/wet sanding wipe to work every side of within corners.
Solidly grasp a calculated sanding wipe, apply consistent weight, and move here and there, inner corners for a direct. Proceed that sponge in a round motion to quill the progress border of the completed corner crease.
Step 8: Preparation for Painting
In the wake of sanding drywall, get ready for painting with clearing the area or vacuuming it to wipe off all the residue. Clear off the gathered waste from within the region and residue balls from extensive taped creases and clasp strips. Something else put a smooth layer of residue over the whole drywall surface, particularly along the change borders of the ridges and latch pieces. The waste will tie with paint and give a plaster to veil scrapes, holes, and abraded surface paper. Paint will not be wasted if you have a good idea about the paint estimate while preparing for the paint.
Editor's Tips
To sand drywall more efficiently, dampen the surface slightly before sanding. This reduces dust and creates a smoother finish. Use a sanding sponge for better control and less mess.
How to Remove Scuff Marks?
Removing drywall scuff marks can be relatively easy with the right materials and techniques. Here's a step-by-step guide to help you get rid of those scuff marks:
Materials you'll need:
- Clean, soft cloths or sponges
- Mild detergent or dish soap
- Warm water
- Baking soda (optional)
- White vinegar (optional)
- Magic eraser (optional)
- Paint touch-up (matching paint color)
Steps:
- Prepare the Area: Start by clearing the area around the scuff marks. Remove any furniture or items that may be in the way.
- Clean the Wall: Before attempting to remove the scuff marks, it's a good idea to clean the entire wall gently. Use a soft cloth or sponge, warm water, and a mild detergent or dish soap. Wipe down the area to remove dirt and dust. Rinse with clean water and allow it to dry completely.
- Use a Magic Eraser (optional): Magic erasers are great for removing scuff marks. Wet the magic eraser and gently rub the scuff mark in a circular motion. Be careful not to scrub too hard, as it can remove paint if you're not cautious. Test in an inconspicuous area first to ensure it won't damage the paint.
- Try Baking Soda (optional): Make a paste by mixing baking soda with a small amount of water until it forms a thick paste. Apply the paste to the scuff mark and gently rub in a circular motion with a soft cloth or sponge. Rinse with clean water and dry the area.
- White Vinegar Solution (optional): Mix equal parts white vinegar and water in a spray bottle. Spray the solution onto the scuff mark and let it sit for a few minutes. Then, gently rub the mark with a cloth or sponge. Rinse with clean water and dry.
- Touch-Up Paint: If the scuff mark is still visible after trying the above methods, you may need to touch up the paint. Make sure you have the same paint color that was used on the wall. Apply a small amount of paint to the scuff mark using a brush, feathering the edges to blend it with the surrounding area. Allow it to dry and apply additional coats if necessary.
- Finishing Touches: Once the wall is clean and the scuff mark is gone, inspect the area to make sure it matches the surrounding paint. If necessary, you may want to repaint the entire wall to ensure a consistent appearance.
Remember to always test any cleaning or paint touch-up methods in an inconspicuous area first to ensure they won't damage your wall's finish.
Don't Oversand!
Avoid excessive sanding of drywall to prevent damage. Over-sanding can weaken the surface and lead to uneven results. Use gentle, even strokes and check your progress frequently for a smooth finish.
How to Sand Drywall Fast?
Sanding drywall can be a time-consuming and dusty task, but there are several tips and techniques you can use to make the process faster and more efficient. Here's how to sand drywall quickly:
Gather your materials:
- Sandpaper or a sanding screen (usually 120 or 150-grit)
- Sanding pole or sanding block
- Dust mask or respirator
- Safety glasses or goggles
- Drop cloths or plastic sheeting to protect your workspace
Start with a light touch:
Begin by lightly sanding the drywall surface. Use a sanding pole or sanding block to evenly distribute pressure, which helps avoid over-sanding in one area.
Use the right grit:
Start with a coarser grit sandpaper (around 120-grit) to remove any high spots, imperfections, or ridges. Once the surface is relatively smooth, switch to a finer grit (around 150-grit) for a smoother finish.
Work in sections:
Divide the wall into manageable sections and focus on one section at a time. This allows you to work more efficiently and ensures even sanding.
Feather the edges:
When sanding joint compound or drywall mud, feather the edges of the patches or seams. This means gradually tapering the sanding towards the surrounding wall to create a smooth transition.
Keep the sandpaper clean:
Drywall dust can quickly clog sandpaper, making it less effective. Tap or brush off the sandpaper frequently to remove dust buildup.
Sand in different directions:
Change the direction of your sanding strokes periodically to prevent creating visible patterns on the drywall. This helps to achieve a more uniform finish.
Check your progress:
Stop and inspect your work periodically by running your hand over the sanded area. This will help you identify any remaining imperfections that need attention.
Use a work light:
Good lighting is essential for spotting imperfections. Shine a work light at a low angle across the wall to highlight any flaws.
Repair as needed:
If you find any areas that still have imperfections after sanding, touch up those areas with joint compound or patching compound and let it dry before sanding again.
Clean as you go:
Dust generated during drywall sanding can be overwhelming. Use a shop vacuum or a dust collector with a HEPA filter to minimize dust in your workspace. Also, wear appropriate protective gear, including a dust mask or respirator, safety glasses, and gloves.
Finish with a fine sanding:
Once you've achieved a smooth surface with the finer grit sandpaper, you can further improve the finish by using a very fine grit (around 220-grit) sandpaper to give the wall a final pass.
Remember that patience and attention to detail are crucial when sanding drywall. Rushing through the process can result in a less-than-perfect finish, which may require additional touch-ups and sanding. Take your time and follow these steps to achieve a smooth, professional-looking drywall surface.
How to Sand Drywall Corners?
To sand drywall corners, start by using a sanding block or sandpaper with a fine grit (around 120-150) to feather the joint compound. Hold the sandpaper at a slight angle and sand in smooth, even strokes, focusing on the joint area. Be cautious not to oversand or create grooves.
Use a damp sponge to clean off dust and check for imperfections. If needed, reapply joint compound, let it dry, and repeat the sanding process until the corner is smooth. Finish by wiping down the area with a clean, damp cloth to remove any remaining dust.
Conclusion
In conclusion, sanding drywall is a crucial step in achieving a smooth and flawless finish for your walls. By following the proper techniques and using the right tools, you can achieve professional-looking results. Remember to start with coarse-grit sandpaper and gradually move to finer grits, always sanding in a circular motion to avoid uneven patches. Finally, be sure to clean up thoroughly to ensure a clean and ready surface for painting or finishing. With patience and attention to detail, you can transform your drywall into a polished canvas for your desired interior look.