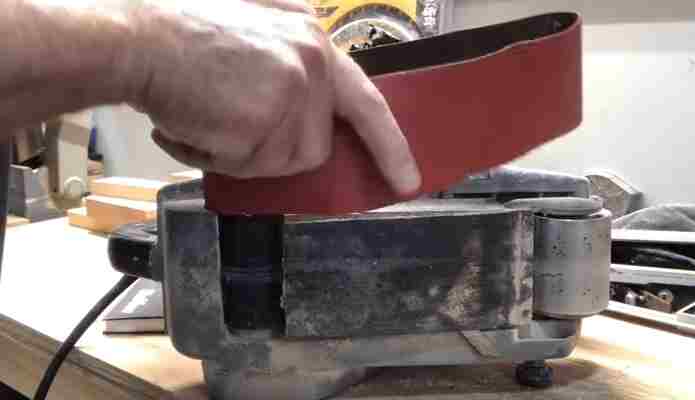
If you are looking to replace the belt on your belt sander, this post will be of great help. You can either purchase a new sandpaper belt or remove the old one and replace it with a new one. It is important to know how to change sandpaper belts on a belt sander before taking any steps. This blog post will show you exactly what you need to do in order for that process go smoothly without accidents or injuries. There are many benefits of changing your sandpaper belts, but it all depends if they have worn down enough for replacement.

If I say, you should change worn out belt, that doesn't precisely answer when to change actually. Even if the belt works fine, it sometimes looks work out. So you can't just tell it is useless all of a sudden. To be sure that the time has finally come to change it, check sandpaper by running your hand across it. If you feel resistance from it, then it's time to change it. Don't forget to switch off the belt sander when you are examining it with your palm.
How to put sandpaper on a Handheld Belt Sander?
Changing a sandpaper belt on a belt sander is nothing much of hard labor; its quick and painless. Here you will see how to change a belt in a handheld belt sander.
Things you will need:
- A belt sander, of course
- A flathead screwdriver
- New sandpaper belt to install
Step 1: Unplug the belt sander
Unplug the belt sander you are using. Now take it to a flat board or bench to begin the process.
Step 2: Releasing the Belt Tension lever
The tension in a belt sander keeps the belt sander in place. As you want to take out the wan belt from the belt sander, you have to loosen the tension first. So, find where the belt tension is located and pull it back. Then you are free to loosen the belt from the machine.
Step 3: Pulling the old belt off the sander
As you have loosened the tension, pull the old belt sandpaper from the sucker and throw it away unless you plan to do something with it.
Step 4: Aligning a new sandpaper belt
Most importantly, you should check the belt size in the new sandpaper you pick. Mostly you will find the number inside the sandpaper quite visibly. Always check the size and match it with the belt sander you are using.
Moreover, you will see the arrow marks inside the opposite side of the sandpaper. The arrow mark directs you to which way you should install it. It directs the way the sander would rotate. So, follow the mark while installing; otherwise, the sandpaper will break while running along with the machine.
Step 5: Slide on the new belt
Simply slide the belt on the sander. Align it with your hands on the wheels.
Step 6: Re-tension the Lever
As you have aligned the belt with the whiles, you need to track it now. You will do that with the tracking nub (as we call it 'tension'). It will happen with the sander running.
So, turn the power on and turn the nub one way or the other to move the belt side to side. The idea behind it is that you have to make the new sandpaper aligned well with the front and back wheels.
There you have it! You have installed a new belt sander successfully.
Learn how to change the belt on a belt sander in the video below:
Tip:
As I have mentioned that you will need a flathead screwdriver and haven't written when to use; here is where you can make use of it.
If your belt sander doesn't come with a lever that holds and releases the sandpaper, then press the front wheel against something. Physically force back the wheel as long as it doesn't lock into a non-tension state. Pry the wheel back with a flathead screwdriver, and the tool will return to tension mode.
How to Change Belt on a Stationary Belt Sander?
Things You Will Need
- Slotted screwdriver
- Level
- Adjustable wrench
- Philips screwdriver
Step 1: Loosen and tighten the screws
First, loosen the two hex screws. Loosen one with the wrench provided and thus move the sanding arm in a vertical position. Now, tighten two screws.
Step 2: Set belt tension
After that, loosen the nut lock and set the belt tension by turning it with a screw. You should turn it counterclockwise to undo.
Step 3: Place new belt
Now, rise on the motor pulley to replace the existing belt. Then, place the new belt on both pulleys.
Step 4: Finish with the setting
Apply light pressure to the belt. Place the light pressure at the center span of the pulleys. Also, tighten the set screw turning it to clockwise. Continue it until the belt is stretch.
Again apply the light pressure to maintain the tension between ¼" and ½"
Do not over tighten as the belt doesn't require this to work better. Rather too much stretching can shorten motor and belt self-life.
Final Words
Comparing to a handheld belt sander, it is a little bit hard to change belt in a stationary belt sander. Other than following these steps diligently, you might take help from woodworkers or experts.
Always match the direction given at the opposite side of the belt sander, or else your new sandpaper will rip apart. Matching the sandpaper size with the machine is equally important. You will normally find the number tag in the sandpapers.
So, change the sandpaper slow and smart.