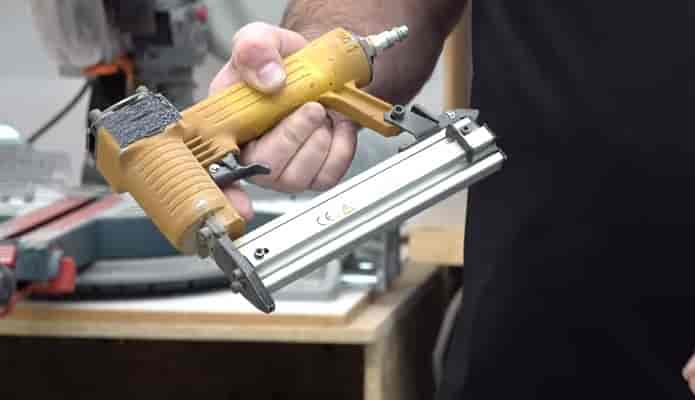
A pneumatic brad nailer is one of the most underrated tools in a woodworker's arsenal. With the right technique, it can be used to create very strong joints that are nearly invisible from the outside. In this blog post, I will show you how to use a pneumatic brad nailer to create beautiful joints that will last a lifetime. Stay tuned!
Related: Pneumatic V Nailers [Buying Guide with Updated List]

A pneumatic brad nailer is a handy tool that can quickly and easily attach trim, molding, or small pieces of wood. Here are six steps to using a pneumatic brad nailer:
1. Read the manufacturer's instructions before using the pneumatic brad nailer.
Anyone who has ever worked with power tools knows that reading the manufacturer's instructions is important before using the tool. This is especially true for pneumatic brad nailers, which are powerful tools that can easily cause damage if used improperly. Therefore, the first step in using a brad nailer is to choose the right size and type of brad for the job.
3. Load the brad nails into the pneumatic brad nailer.
Once you have selected the appropriate brad, you will need to load it into the nailer. Make sure that the brad is properly seated in the chamber before continuing.
2. Connect the air compressor to the pneumatic brad nailer.
The next step is to connect the air compressor to the nailer using the provided hose. Once everything is properly connected, you can turn on the air compressor and begin nailing.
4. Position the trim, molding, or small piece of wood that you want to attach.
Before attaching trim, molding, or any other small piece of wood, you need to position it correctly. This can be a bit tricky, especially if you're working alone.
- The first step is to hold the piece in place and mark the top and bottom locations.
- Then, using a tape measure, find the center point and mark it.
- Next, use a level to make sure the piece is level and make necessary adjustments.
- Once you're satisfied with the positioning, use a pencil to trace around the edges of the piece. This will give you a reference for where to put the adhesive.
With the trim, molding, or small piece of wood properly positioned, you're now ready to attach it securely.
5. Place the tip of the pneumatic brad nailer against the trim's surface, molding, or small piece of wood.
Before you can begin nailing, you need to find the perfect spot for the tip of the nailer. The pneumatic brad nailer should be placed against the trim's surface, molding, or small piece of wood that you're working on. To avoid damaging the material, it's important to find a flat and even spot. Once you've found the right spot, you can start nailing.
6. Squeeze the trigger to fire a brad nail into the surface.
To use a brad nailer, simply squeeze the trigger to fire a brad nail into the surface. The head of the brad will sink into the wood, holding the two pieces together. When you're done nailing, release the trigger, and the brad nailer will eject the spent brad.
Related: Best 2 in 1 Brad Nailer Stapler That Does It All
Here's a video showing you how to use a pneumatic brad nailer:
Tips for Using a Pneumatic Brad Nailer
- Always wear safety glasses or goggles when using a pneumatic brad nailer.
- Connect the air hose to the proper size fitting on the brad nailer.
- Make sure the air pressure is set correctly for the type of nails being used.
- Load the nails into the magazine according to the manufacturer's instructions.
- Position the workpiece to drive the nails into a solid surface.
- Use only the specified type and size of nails for the pneumatic brad nailer.
- When finished using the pneumatic brad nailer, disconnect the air hose and turn off the power.
Common mistakes people make when using a pneumatic brad nailer [Solutions Provided]
1. Not using the right size nails for the job
Make sure you use the correctly sized nails for your pneumatic brad nailer. The most common mistake is using too small of nails, which can cause the brad nailer to jam.
2. Not oiling the nailer regularly
You should oil your pneumatic brad nailer regularly to keep it in good working condition. Unfortunately, most people forget to do this and wonder why their nailer isn't working properly.
3. Not using the right pressure
Using too much or too little pressure can cause your pneumatic brad nailer problems. Make sure you are using the correct pressure for the job at hand.
4. Firing the nailer too close to the edge of the material
This is a common mistake that can cause the nails to bend or break. Make sure you are firing the nailer at least 1 inch from the edge of the material.
5. Not cleaning the nailer regularly
It is important to keep your pneumatic brad nailer clean like any other tool. This will help it work properly and last longer.
Final Words
So, there you have it. Learn how to use your pneumatic brad nailer like a pro. By following these simple tips, you'll be able to tackle any project with ease and confidence. Have fun using your new tool, and be sure to experiment with different types of nails and materials to see what works best for you. Thanks for reading!