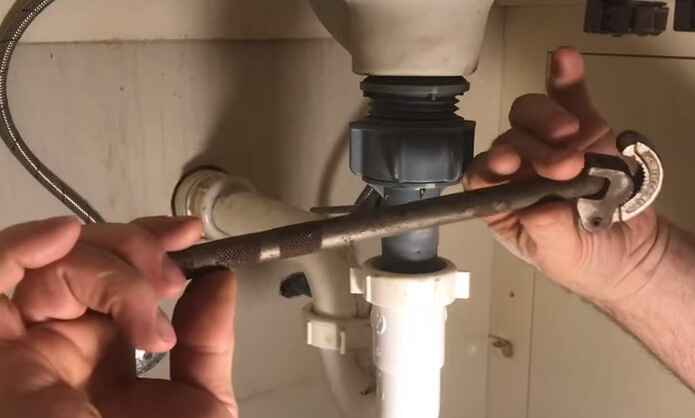
To use a basin wrench, position its jaws around the nut beneath the sink. Rotate the tool clockwise to tighten or counterclockwise to loosen. The long handle provides leverage in tight spaces, making plumbing tasks more manageable.
Unlock the mystery of plumbing with our beginner-friendly guide on 'How to Use a Basin Wrench.' If you've ever found yourself struggling with tight spaces under the sink or wondered how to tackle that stubborn nut, you're in the right place. Join me, a fellow plumbing novice turned enthusiast, as we delve into the basics of this essential tool. Say goodbye to plumbing woes and gain the confidence to handle any sink-related challenge with ease. Let's wrench our way to plumbing success together!
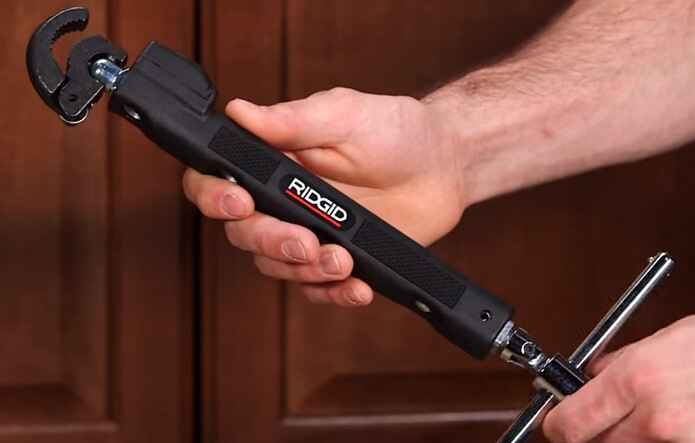
A basin wrench reaches and tightens or looses faucet nuts behind the sink. It has a long shaft and a bent end, allowing you to get in behind the sink.
Basin wrenches are typically used in commercial settings where a lot of plumbing work is done. But they can also come in handy for the average homeowner who wants to do some basic repairs on their own home. For example, if you're replacing a kitchen faucet, you'll need to use a basin wrench to remove the old one.
Which way do you turn a basin wrench?
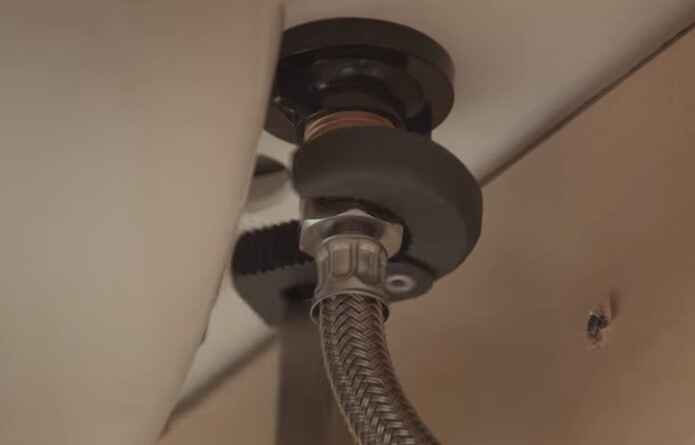
The direction you turn a basin wrench depends on the particular basin wrench that you are using. Some basin wrenches have a ratcheting mechanism that allows you to turn them in either direction, while others are designed only to be turned in one specific direction. Always consult the instructions that came with your basin wrench to be sure which way to turn it.
What are some of the unique features of a basin wrench?
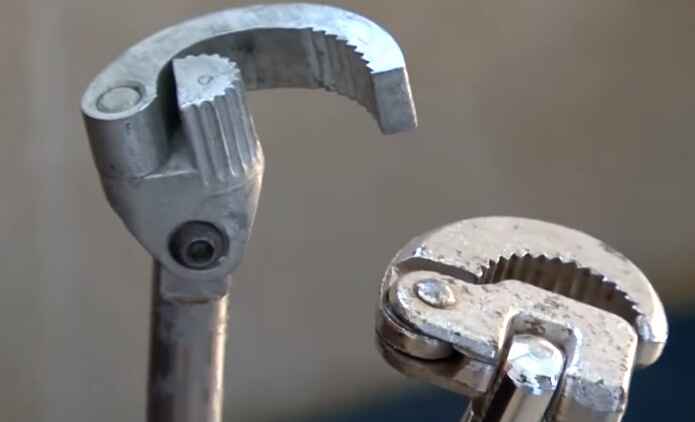
A basin wrench is a specialized plumbing tool designed for tightening and loosening nuts and bolts in hard-to-reach places, such as those found under sinks and basins. Its unique features make it well-suited for these tasks:
1. Swivel Head:
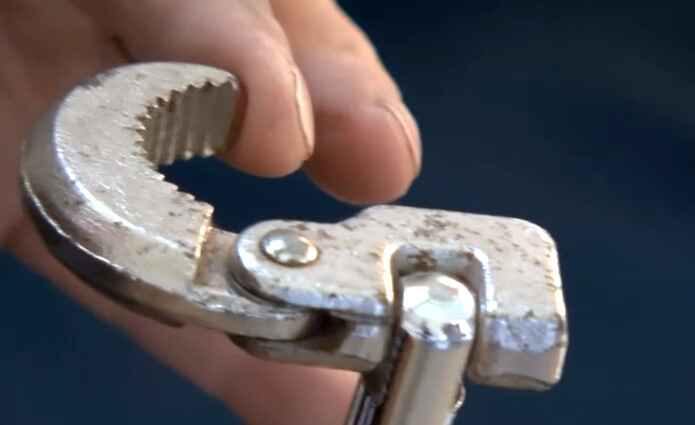
One of the most distinctive features of a basin wrench is its swivel head. The head of the wrench can rotate up to 180 degrees, allowing you to access nuts and bolts in tight and awkward spaces easily.
2. Long Handle:
Basin wrenches typically have long handles that provide leverage for turning nuts. The length of the handle allows you to reach deep into confined spaces without having to use excessive force.
3. Telescoping Handle:
Some basin wrenches come with telescoping handles that can be extended or retracted, further enhancing their reach and adaptability.
4. Spring-Loaded Jaws:
The jaws of a basin wrench are spring-loaded, making it easier to grip and turn nuts and bolts. When you release pressure on the handle, the jaws automatically open, allowing you to reposition the wrench without needing to manually adjust the jaws.
5. Adjustable Jaw Size:
Most basin wrenches feature an adjustable jaw size, enabling them to accommodate nuts and bolts of various sizes. This versatility makes them suitable for different plumbing applications.
6. Ratcheting Mechanism:
Some models of basin wrenches include a ratcheting mechanism, which allows you to turn nuts and bolts with minimal effort. This feature can be particularly useful when working in tight spaces where a full rotation of the wrench handle may not be possible.
7. Ergonomic Handle:
Many basin wrenches have ergonomic handles that provide a comfortable grip, reducing hand fatigue during extended use.
8. Durability:
Basin wrenches are typically constructed from durable materials like steel, making them capable of withstanding the demands of plumbing work.
9. Non-Marring Jaws:
To prevent damage to the nuts and bolts being worked on, basin wrenches often have non-marring jaws, which are designed to grip without leaving scratches or dents.
10. Easy Storage:
Some basin wrenches have a built-in hanging hole or loop on the handle for convenient storage in a tool rack or on a pegboard.
These unique features make the basin wrench an essential tool for plumbers and DIY enthusiasts when working on sink and basin installations or repairs in tight and hard-to-reach areas.
How to use a basin wrench?
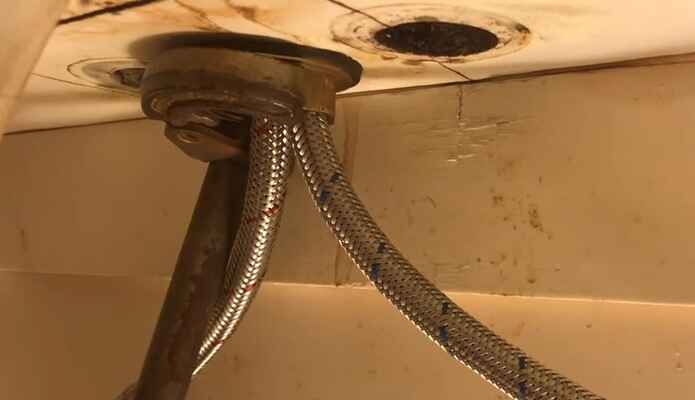
A basin wrench is a handy tool used for tightening or loosening nuts that are often hard to reach, such as those under a sink. It has a long handle with a swiveling jaw at one end, which allows you to work in tight spaces. Here's how to use a basin wrench:
Materials You’ll Need:
- Basin wrench
- A basin or sink with plumbing that needs adjustment
- A towel or bucket to catch any water that may leak during the process (if working on a sink)
Steps:
1. Turn Off Water:
If you're working on a sink, turn off the water supply to the faucet or fixture you're working on. This typically involves closing the shutoff valves located beneath the sink. If there are no shutoff valves, you may need to turn off the main water supply to your home.
2. Clear the Area:
Remove any items stored under the sink or around the area to give yourself more room to work.
3. Position the Basin Wrench:
Hold the basin wrench so that the swiveling jaw is facing the nut you want to loosen or tighten. The long handle should be above the nut.
4. Insert the Jaw:
Reach the basin wrench into the tight space under the sink and position the swiveling jaw around the nut. Make sure the jaw grips the nut securely.
5. Rotate the Handle:
Use the long handle of the basin wrench to turn the nut. You can turn it clockwise to tighten or counterclockwise to loosen, depending on your needs.
6. Adjust the Swivel:
If you encounter difficulty reaching the nut at the right angle, you can adjust the swivel on the basin wrench to get a better grip.
7. Repeat as Necessary:
If you're removing a fixture, such as a faucet, you may need to use the basin wrench multiple times to loosen different nuts and connections. Be patient and persistent.
8. Tighten Securely:
When installing a fixture or making a repair, ensure you tighten the nuts securely but not excessively, as over-tightening can damage plumbing connections.
9. Turn On Water:
Once you've completed the necessary work, turn the water supply back on and check for any leaks. Tighten any connections further if needed.
10. Clean Up:
Replace any items you removed from under the sink and clean up any water that may have spilled during the process.
Pro Tip:
Remember to always exercise caution when working with plumbing, especially if you're not experienced. If you're unsure about any part of the process or encounter complications, it's advisable to consult a professional plumber to avoid potential issues or damage to your plumbing system.
How to use a basin wrench video
What are some of the benefits of using a basin wrench?
When it comes to plumbing, a basin wrench is an extremely versatile and useful tool. Here are ten benefits of using a basin wrench:
1. Reach difficult-to-access areas:
A basin wrench is specifically designed to reach tight spaces and difficult-to-access areas. This makes it ideal for working on plumbing fixtures that are located in tight spots.
2. Loosen or tighten nuts and bolts:
A basin wrench can be used to loosen or tighten nuts and bolts. This makes it a handy tool to have on hand when working on plumbing fixtures or pipes.
3. Prevent damage to pipes:
Because a basin wrench can be used to loosen or tighten nuts and bolts, it can help prevent damage to pipes. This is especially useful when working on older plumbing fixtures or pipes.
4. Avoid scratches:
When using a basin wrench, there is no need to worry about scratching surfaces. The jaws of the wrench are designed to grip without damaging surfaces.
5. Get a tight seal:
A basin wrench can be used to get a tight seal on plumbing fixtures and pipes. This helps prevent leaks.
6. Reach recessed areas:
The long handle of a basin wrench makes it possible to reach recessed areas that would be difficult to access with other tools.
7. Use in tight spaces:
The compact size of a basin wrench makes it ideal for use in tight spaces. This is especially useful when working on plumbing fixtures located in tight spots.
8. Apply torque:
A basin wrench can apply torque to nuts and bolts. This helps loosen or tighten them.
9. Prevent slipping:
The jaws of a basin wrench are designed to grip surfaces tightly. This prevents slipping and helps to avoid damage to surfaces.
10. Help save time:
A basin wrench can help with plumbing fixtures or pipes. This is because it can quickly loosen or tighten nuts and bolts.
Tips for Using a Basin Wrench
Like most people, you probably don't give much thought to your basin wrench. But if you've ever had a leaky faucet or a clogged drain, you know how important this tool can be. A basin wrench is specially designed to reach tight spaces and loosen stubborn nuts and bolts.
Here are eight tips for using a basin wrench:
1. Use the correct size wrench.
Make sure the basin wrench is the right size for the job. If it's too small, it won't be able to loosen the nut or bolt. If it's too large, it could damage the fixture.
2. Position the wrench correctly.
The basin wrench has a long, narrow body and a jaw that opens and closes. To use it correctly, position the wrench, so the jaws are parallel to the nut or bolt you're trying to loosen.
3. Use both hands.
Because the basin wrench is long and slender, it can be challenging to control with one hand. For added stability, use your non-dominant hand to hold the end of the wrench while you loosen the nut or bolt with your dominant hand.
4. Apply pressure gradually.
When loosening a stubborn nut or bolt, applying as much pressure as possible is tempting. But this can damage the fixture or break the wrench. Instead, apply pressure gradually until the nut or bolt starts to loosen.
5. Use an extension if necessary.
Try attaching an extension if you can't reach the nut or bolt with the basin wrench. This will give you extra reach and help you get a better angle on the nut or bolt.
6. Be careful not to strip the threads.
When loosening a nut or bolt, be careful not to strip the threads. If you do, removing the nut or bolt will be difficult without damaging the fixture.
7. Don't overtighten the nuts or bolts.
Once you've tightened the nuts or bolts, don't overtighten them. This can damage the fixture and make it more difficult to remove in the future.
8. Store your basin wrench in a safe place.
When you're finished using the basin wrench, store it in a safe place where it won't get lost or damaged.
By following these tips, you'll be able to use your basin wrench like a pro the next time you have a leaky faucet or clogged drain.
Final Words
So there you have it – your complete guide to using a basin wrench. I've shown you how to use it safely and effectively and some tips for this handy gadget. Now that you know all there is to know about basin wrenches go forth and fix those leaky faucets with confidence! Have you tried using a basin wrench before? What was your experience like? Let me know in the comments below.