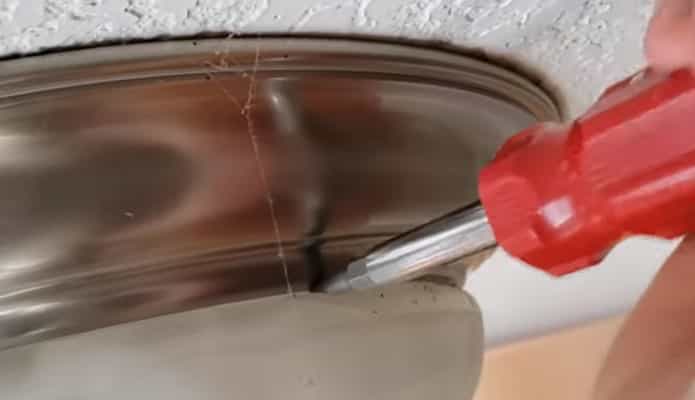
A lot of times, lights go off or starts to malfunction just randomly. As a result, you have to replace the light since you can’t go on with a dark room. Putting a light on or off doesn’t have much hassle to it, but it can be troublesome when it comes to taking off the light cover.
That’s why here we tell you how to take off the ceiling light cover. You will know about the different ways you can do it for different types of light covers. Without any further ado, let’s hop right into it.
Related:
How To Remove RV Light Covers? [8 Easy Steps]

Before we get into the whole process, let’s get to know the tools you might need to do the job.
Stepping stool or a ladder: Since the light is upon the ceiling, you will need a platform to stand on.
Gloves: To keep your hands clean and protected, you must wear gloves.
Screwdriver: Some light covers come with screws that would require a screwdriver.
A cloth: While you are up there, you can consider cleaning the area with a cloth as well.
As you can see, you don’t need anything special to remove the ceiling light cover. All these pieces of stuff are pretty much available at any home. Now, let’s get going with the process.
How to Remove Ceiling Light Cover? (3 Types of Ceiling Light Cover)
There are different ceiling light fixture covers that you might come across. We will go through all of them. First of all, let’s start with the ceiling light fixture cover plate with clips.
Type-1: How to Remove Ceiling Light Cover with Clips? (5 Steps)
If you have a ceiling light cover with clips on it, you can follow the below instructions.
Step-1: First of all, arrange the tools and materials you will need. Usually, you will need the ladder for clipped ones and maybe a screwdriver to get the clips off.
Step-2: Wear all the protective gear to protect yourself from dust or any uncertainties.
Step-3: For this one, you have to keep one hand on the ceiling light glass cover center.
Step-4: Then, look for the loose clip around the edges of the cover. One clip tends to be a bit loose than the other for such purposes.
Step-5: Now, pull out the cover gently and carefully. Make sure to have to good grip on the cover; otherwise, it may fall and break.
And that’s it. You can easily remove a ceiling light cover with clips. Now, let’s move on to the next one, which comes with screws.
Type-2: How to Replace Ceiling Light Cover with Screws? (6 Steps)
The best part of this kind of cover is that the ceiling light cover won’t come off.
Step-1: Before you get onto the process, prepare all the tools you will need. For this, you must have a screwdriver, a stable ladder or stepping stool, and a pot or pan to hold the ceiling light cover screw.
Step-2: You also have to wear gloves and any additional protective gear to protect yourself.
Step-3: Next, upkeep your one hand on the bottom of the ceiling light bulb cover.
Step-4: Now, take the screwdriver in one hand and start unscrewing the cover from one end.
Step-5: When you see the knob is accessible, look for the washer and keep it secure in the pot or pan along with the screw.
Step-6: Finally, remove the glass cover very carefully and firmly.
So, this is how to open a ceiling light cover that comes with screws. It’s probably the hardest one since you have to climb up a ladder and unscrew the whole thing. But it’s the best and safest option for a light cover as well. Next, we take a look at removing the cover without any screws or clips.
Type-3: How to Remove Ceiling Light Cover No Screws? (5 Steps)
In most cases, people don’t use a ceiling light cover without screws or clips. So, if you have one at your home, here’s how you can remove it.
Step-1: Like the previous processes, you will need to prepare the tools and things required to remove the cover. You will need a ladder for this one and no extra tool.
Step-2: Try wearing gloves that provide traction. Because you will need to rotate the cover, which you can’t do with your hands only.
Step-3: First of all, you have to hold the whole cover with both your hands. As it’s not protected with any screws or clips.
Step-4: Then start rotating the cover in a counterclockwise direction. If the cover is stuck, you can give it a little bump using your shoe.
Step-5: As you rotate the cover, you will see it coming off. Keep rotating until it does. And make sure you are holding the cover properly the whole time.
These are the typical ceiling light covers you will get to see. There are some DIY ceiling light cover and many ceiling light cover ideas you can check out online. But all of them follow the same basic procedure. They are just a decorative ceiling light cover plate that you can use to better your room outlook
Watch the video on how to remove the ceiling light cover:
8 Safety Tips for Removing Ceiling Light Cover
Here are some safety tips you must know while removing the ceiling light cover at your home.
Final Words
So, now you know how to change the ceiling light cover. It doesn’t matter what type of ceiling light cover you have; you can easily follow the process we discussed and get the job done. It’s not difficult at all since we kept in mind that no one here is professional. I hope this helps you remove your ceiling light cover.