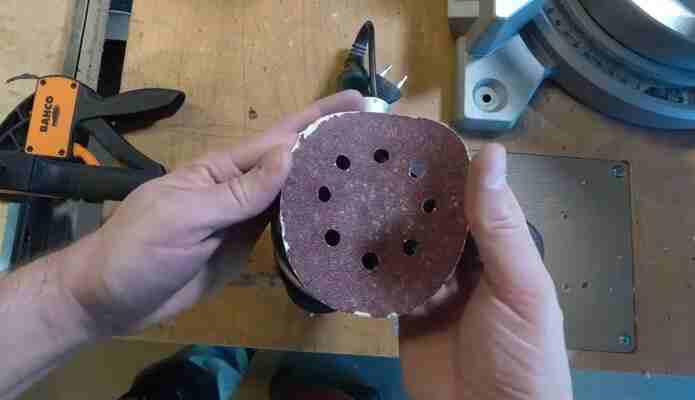
Have you ever seen a sandpaper sheet on a random orbital sander? Well, if not, let us show you how to put sandpaper on your random orbital sander with 5 easy steps! Plus, I'll be putting some key facts you must know about hook and loop sandpaper. For cleaning sandpaper, you will learn a new and easy way. This will be an informative blog post. We hope this helps!

Step-1: First, turn the random orbital sander and lay down to the flat surface to reach the bottom. Disconnect the power cord to the sander.
Step-2: Second, grab and pull off the old sandpaper.
You can easily peel the old sandpaper back by grabbing any corner of it. Now, carefully try to detect if there are any left debris and dirt where the sandpaper is located. If you find any, clean it.
Step-3: Third, take the new sandpaper and hold it on the top of the random orbital sander, line it up. Make sure the sandpaper matches the random orbital sander's size. Now put light pressure to place the sandpaper. Remember that the sticky side will stay down while the sandpaper side will stay facing out.
Step-4: Push down the sandpaper diligently. Pat on the sandpapers entire area with the help of your figure, so that it sits well with the pad. After that, make the orbital sander stand upright. Plugin and turn the power on.
Step-5: When you are done checking, turn off the power and flip the machine. Check if the sandpaper is still staying in place or not after using it. If you see the sandpaper appearing wobbly and coming off from its place, reset it by pressing it with your fingers.
Be sure to watch this video on how to place sandpaper on random orbital sanders:
Tips:
I would recommend you test in on sample woods for a few seconds before the actual work. Testing is always a better decision as you get to see much progression you have made attaching the sandpaper.
Why Are Hook and Loop Sandpaper Best for Random Orbital Sander?
The hook and loop system, a non-permanent fastener, is very useful for certain machines, especially for random orbital sanders. As it is interchangeable, a random orbital sander can efficiently work with it.
While sanding with a random orbital sander, there is always a downward force on the sanding pad. The random orbital sander moves in circular order. As a result, the hooks and loops get pushed continuously against each other. Thus, it makes a tight bond between them. For better understanding we recommend to read about how does a random orbital sander work.
There is no chance of the sandpaper's wobbly appearance as it gets attached too well with the sanding process. The pad will stay firmly to the end. Moreover, you can remove it easily also. There is no way you will tear or spoil the pad or turn things messy while removing.
You can use sandpaper of any grade and shapes fitting your requirement.
That's why hook and loop sandpapers are best for random orbital sanders.
Secrets!
Clean and Extend the Life of Sandpaper with an Old Tennis Shoe!
With dust and debris, the sandpaper is prone to get jammed. You better clean it if you want to extend its lifetime and make the best use of it.
Did you know that you can clean the sandpaper with an old tennis shoe in no time? Now your old tennis shoe is pretty useful, right? It really is!
Use the rubber sole of the shoe to the sandpaper when it is running. Naturally, the sandpaper will let loose of the junks.
Cleaning sandpaper reduces the chances of burn and leaving swirl marks, intensifies its abrasive life, and develops its finishing quality.
Final Words
The random orbital sander is at its best when the question of quality finish comes first. In this case, sandpaper plays a vital role in delivering a good result. Attaching sandpaper to an orbital sander is not much of a hassle as long as you follow the above steps.
I would recommend using high-quality hook and loop sandpapers so that it doesn't come off and create a disturbance while sanding. I hope this article helped introduce you to how to put sandpapers on a random orbital sander.