Yes, you can sand pressure-treated wood, but it's essential to let it dry thoroughly before sanding. Wear protective gear, as the wood may contain chemicals. Regular sandpaper and a gentle touch work well.
Embarking on a woodworking project with pressure-treated wood? Wondering if sanding is a viable option for achieving that smooth, polished finish? As a fellow DIY enthusiast, I understand the importance of precision and aesthetics in every project. In this blog post, we'll delve into the question: Can you sand pressure-treated wood? Let's explore the ins and outs of this common query and uncover the secrets to refining your pressure-treated creations with a user-friendly perspective.


Pressure treated wood is a type of wood that has been infused with preservatives to protect it from decay and insects. In pressure treating, a liquid preservative is forced deep into the wood fibers, protecting it from decay, rot, and insects. This treatment can extend the life of the wood by up to four times, making it a much more economical choice for woodworking projects.
Pressure treated wood is ideal for a variety of woodworking projects, including:
- Building raised beds for gardening.
- Construct outdoor decks, fences, and play sets.
- Creating furniture to withstand the elements.
- Building retaining walls and other structures that require long lasting durability.
- Construct outdoor steps, walkways, and pathways.
Pressure treated wood is an affordable and sustainable choice for woodworking projects that require long-term protection against the elements. With proper maintenance and care, pressure treated wood can provide lasting protection and offer years of enjoyment.
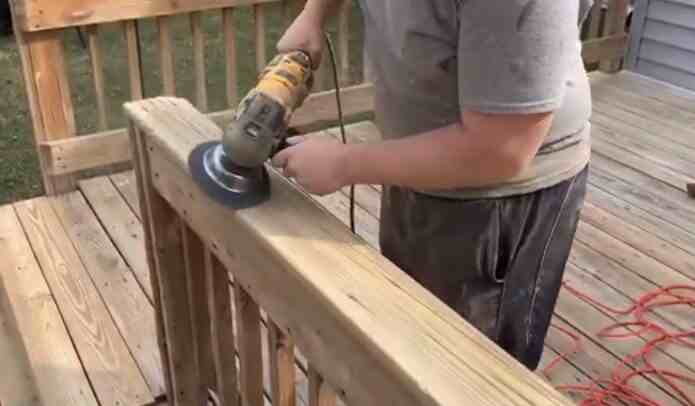
Can you use a power sander on pressure treated wood?
Yes, you can use a power sander on pressure treated wood. However, it's important to note that sanding pressure-treated wood needs to be done with caution. Sanding should only be done when the wood is completely dry, as the chemicals used in the pressure treating can be corrosive and dangerous when dry.
Additionally, you should use fine-grit sandpaper to minimize any risk of splinters or exposure to the pressure treated wood chemicals. Using a power sander on pressure treated wood is an effective way to smooth and refine the surface, but it's essential to take the necessary safety precautions when sanding.
What are the precautions and techniques to use when sanding pressure treated wood?
When sanding pressure-treated wood, it is important to take precautions and use the proper techniques to ensure the best results. Here are five precautions and techniques to keep in mind:
1. Always Wear Protection
Before sanding your pressure-treated wood, wear safety goggles, a dust mask, and gloves to protect yourself from any particles of the wood.
2. Choose the Right Sandpaper
It is important to use the right sandpaper for your pressure-treated wood project. Look for sandpapers with grit between 40 and 120 for the best results.
3. Sand in the Direction of Pressure Treatment Application
When sanding, always move in the same direction as how the treatment was applied to ensure an even look when finished. Moving against this direction may cause discoloration or other unevenness issues on your piece.
4. Vacuum Regularly
As you are sanding, vacuum regularly to remove dust particles from the surface and prevent them from clogging up the sandpaper.
5. Finish with a Sealer
Once you finish your project, finish it with a sealer to protect the pressure-treated wood from weathering and other damage. This will help ensure that your piece looks great for years to come!
Following these five precautions and techniques when sanding pressure-treated wood, you can rest assured that your project will look its best once finished. Now you're ready to start creating your masterpiece!
How to sand pressure treated wood?
Pressure treated wood is an excellent choice for framing projects, as it is resistant to rot, mold, and insect damage. However, the process of pressure treating wood also makes it difficult to sand properly. Fortunately, with the right tools and techniques, you can achieve a smooth finish on pressure treated wood projects. Here's how to do it!
Step 1: Choose the Right Sandpaper
You'll need to use coarser grit sandpaper for sanding pressure-treated wood. The wood has been chemically treated to be moisture-resistant, so you'll need tougher sandpaper to handle the denser material. Start with 80-grit paper, then switch to 120- or 150-grit once you finish the first sanding pass.
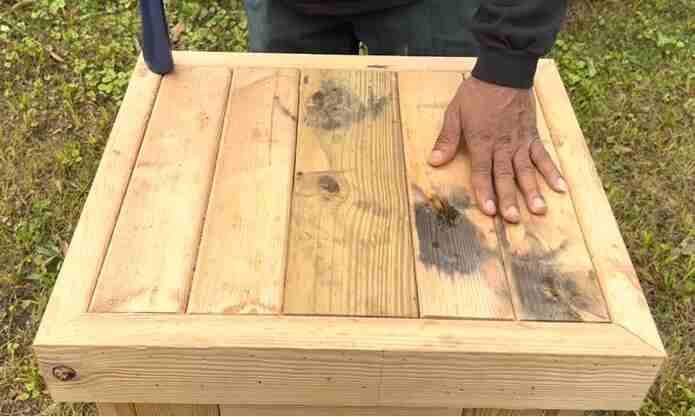
Step 2: Prepare the Wood
Before beginning the sanding process, ensure the surface of your pressure-treated wood is free of debris or dirt. Use a shop vacuum or brush away any dust particles before beginning. This will help ensure that your sanding is as effective as possible.
Step 3: Sand in Long Strokes
When it comes to pressure treated wood, using shorter strokes won't give you the results you're looking for. Instead, use long, sweeping strokes to sand your project. This will help ensure the wood is evenly sanded and give you a smoother finish.
Step 4: Don't Overdo It
It's crucial not to over-sand your pressure treated wood project. Over-sanding can damage the material and make it difficult to achieve the desired look. It's better to take multiple passes with light pressure than one pass with heavy pressure.
Step 5: Finish With a Vacuum & Tack Cloth
Once you've finished sanding your pressure treated wood, use a shop vacuum or dust cloth to remove any excess debris from the surface of the wood. Then, use a tack cloth to remove any remaining dust and particles. This will help ensure a smooth finish with no visible residue.
Following these steps, you can successfully sand pressure treated wood and achieve a beautiful finish on your projects.
What kind of finish can be put on pressure treated wood?
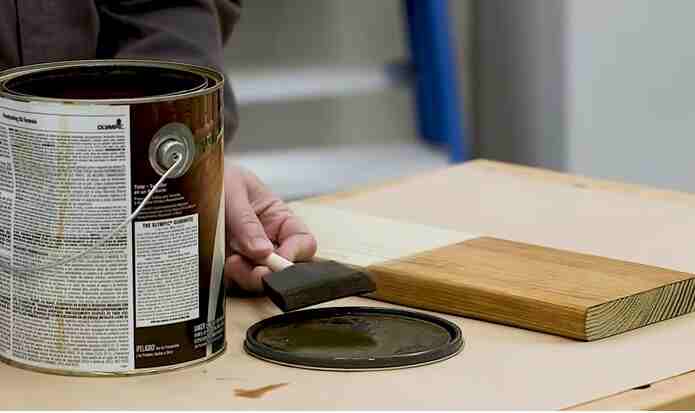
Pressure treated wood can come with a range of finishes, depending on the type of application. Wood intended for outdoor use is often finished with water-repellent or oil-repellent coatings to protect against moisture. At the same time, indoor applications should have more aesthetically pleasing coatings and add a layer of protection.
An exterior-grade finish is generally recommended for decks or other areas exposed to weathering. These finishes typically contain UV inhibitors and mildewcides that help preserve the look of the wood over time.
For furniture or other wooden surfaces used indoors, high-quality varnishes or polyurethanes can provide a protective coating and bring out the natural beauty of the wood.
When applying a finish to pressure treated wood, follow the manufacturer's instructions and allow plenty of time for drying. With the right finish, pressure treated wood can be beautiful and durable.
5 Mistakes to avoid when sanding pressure treated wood
When planning a project that involves sanding pressure-treated wood, it is essential to remember the mistakes you should avoid. Pressure-treated wood is treated with preservatives and chemicals that can be hazardous to you and the environment.
Here are five common mistakes when sanding pressure-treated wood that you should keep in mind:
1. Not Wearing Proper Protective Gear
When sanding pressure-treated wood, wearing long sleeves, pants, and a dust mask is important. This will protect you from the chemicals in the wood, which can be hazardous if inhaled or absorbed through your skin.
2. Not Using Coarse Grit Sandpaper
Pressure-treated wood is often very hard and dense, so it is important to use coarse grit sandpaper when sanding it. This will help ensure you get the best results without damaging the wood.
3. Not Taking Safety Precautions When Working With Dust
During any project involving sanding pressure-treated wood, a lot of dust will be produced during the process. It is essential to take safety precautions such as wearing a face mask, cleaning up any excess dust immediately after sanding, and using a dust collector if available.
4. Not Vacuuming or Wiping Down the Surface After Sanding
After sanding pressure-treated wood, it is important to vacuum or wipe down the surface to remove any excess sawdust before staining or painting. This will help ensure that your finish looks smoother and more even when you are done.
5. Not Testing Your Finish Before Applying It
Before applying any finish product to your pressure-treated wood project, testing it out on a small area first is important. This will help ensure that the product works properly with the wood and produces the desired results before you apply it over the whole piece.
By avoiding these common mistakes when sanding pressure-treated wood, you can ensure that your project looks beautiful and lasts for many years.
What are some tips for sanding pressure treated wood?
Sanding pressure-treated wood can be intimidating, but it doesn't have to be. You can get great results with the right tools and a few simple tips. Here are seven tips for sanding pressure treated wood like a pro.
1. Prep the Surface:
Before you sand pressure treated wood, remove any dirt and debris from the surface. Cleaning the wood will help you get a smoother, more even finish.
2. Choose the Right Sandpaper:
The type of sandpaper you choose can make a big difference in the result. For pressure treated wood, use a medium-grit sandpaper designed explicitly for outdoor use.
3. Start with Coarser Grits:
When sanding pressure treated wood, start with coarser grits of sandpaper and gradually move to the finest grits. This will help you achieve a smooth finish without leaving scratches or grooves in the wood.
4. Use Light Pressure:
When sanding pressure treated wood, be sure to use light pressure. Excessive pressure can damage the wood and create uneven results.
5. Sand in the direction of the grain:
To get a smooth finish, it's important to sand in the direction of the grain. This will help you achieve an even look with minimal effort.
6. Vacuum Between Grits:
As you work your way through different grits, make sure to vacuum off any dust before switching to a finer grit paper. This will help keep your workspace clean and provide better results overall.
7. Apply Finishing Touch:
Once you've sanded the pressure treated wood, you can apply a protective finish to protect it from moisture and sunlight. This will help maintain its beauty for years to come.
Following these tips will help ensure that your sanding project is successful and the results are long-lasting. With some preparation and the right tools, you can sand pressure treated wood like a pro!
Final Words
In conclusion, if you plan to use pressure-treated wood for your project or repairs, it is possible to sand it. Work slowly and carefully to ensure the best results, starting with coarse-grit sandpaper and gradually working your way up to a finer grit. Use a dust mask and safety glasses to protect yourself from airborne particles. With the right approach and care, sanding pressure-treated wood can result in a beautiful, finished look.