Yes, you can use a framing nailer for Hardie siding. However, it's crucial to choose the right type of nails and adjust the nailer's pressure to avoid damaging the siding. Follow Hardie's installation guidelines for optimal results.
Hey fellow DIY enthusiasts! Ever found yourself wondering if that trusty framing nailer in your toolkit could tackle Hardie siding? Well, you're not alone! In this blog post, we'll dive into the nitty-gritty of using a framing nailer for Hardie siding projects. Get ready to unleash the full potential of your tools as we explore the practicality, tips, and tricks of utilizing a framing nailer in the world of Hardie siding installations. Let's nail those siding projects like a pro!
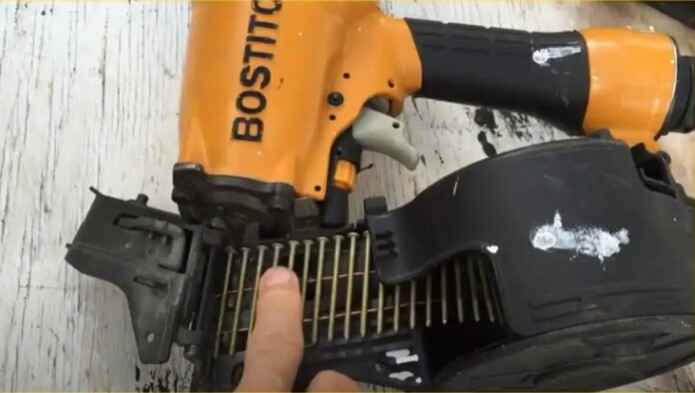
Hardie Siding is a complete siding solution that is attractive, durable, and long-lasting. It's made of fiber cement, giving it superior strength over traditional siding products like vinyl or aluminum. Fiber cement has been proven to last up to 50 years without needing repair or replacement.
Hardie Siding protects against extreme weather, pests, and mold and can resist winds up to 150 mph with its hurricane-resistant design options.This type of siding is easy to install with basic tools, so you don't need special skills or expertise.
It's also low-maintenance - no painting required! With the variety of textures and colors available from Hardie Siding, you'll always get the look you want for your home exterior while feeling confident in its lasting performance and protection from all types of hazards over time.
Can You Use a Framing Nailer for Hardie Siding?
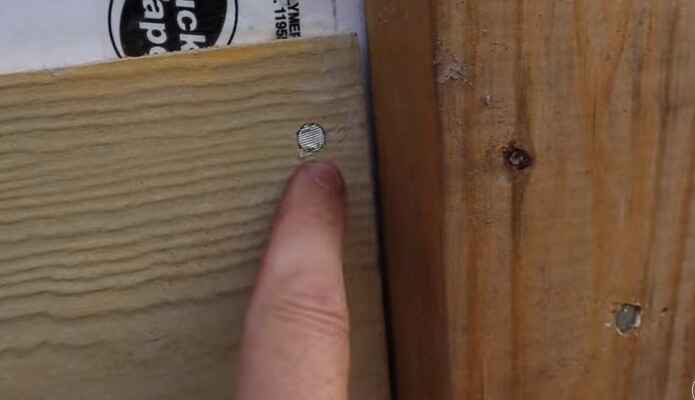
You can use a framing nailer for Hardie siding. A framing nailer (also known as a nail gun) is an ideal tool for installing Hardie siding because you don't have to predrill the holes, and it ensures that your fasteners are driven in straight and secure.
When using a framing nailer for Hardie siding, choose nails with the correct head diameter and length to stay secure in all weather conditions. Be sure to adjust depth-of-drive and pressure settings when driving nails into different materials; this will ensure that your fasteners are set each time properly.
For best results, use galvanized or stainless steel fasteners designed specifically for hard surfaces like wood or concrete, providing superior corrosion resistance and durability. Lastly, always wear safety glasses when working with any power tool!
Advantages of Using a Framing Nailer for Hardie Siding
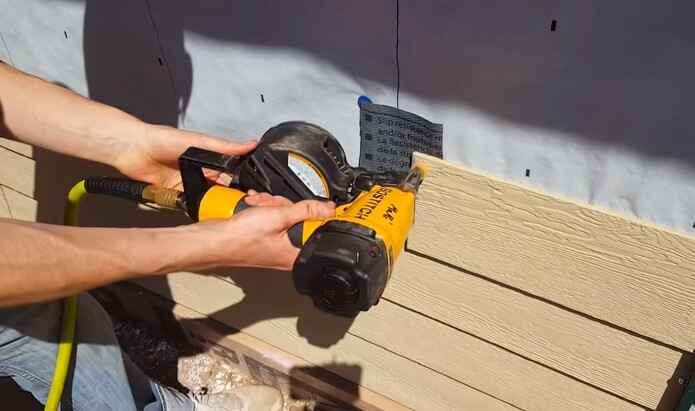
Installing Hardie siding can be daunting unless you have the right tool. A framing nailer is an essential tool for installing Hardie siding and has several advantages.
1: Save time
Using a framing nailer allows for faster installation of Hardie siding. It is much faster than hammering nails by hand. This tool can also save time since it has a magazine that automatically reloads each nail.
2: More Power
A framing nailer offers more power than a manual hammer, allowing you to drive the nails deeper into the siding material. This ensures the siding is firmly attached and won't fall off over time.
3: Precise Nail Placement
The accuracy of a framing nailer enables precise placement of each nail - which helps ensure consistent spacing between boards. It also reduces any risks associated with hammering in nails by hand.
4: Safe Operation
Using a framing nailer reduces the risks associated with hammering nails by hand. It is designed to be held in one hand, making it safe and easy to use. Additionally, since the nails are loaded into a magazine, there is no risk of accidentally hitting your fingers when reloading.
5: Reduced Fatigue
Since you don't have to hammer in each nail, using a framing nailer manually can significantly reduce fatigue and strain on the arms and hands. Long projects will be much easier to complete when using this tool.
6: Professional finish
The professional finish that can be achieved with a framing nailer ensures that Hardie siding looks great once installed. This can help to increase the resale value of your home.
7: Cost-Effective
Finally, framing nailers is relatively inexpensive and can be used for other projects. This means you get good value for money and won't have to purchase extra tools when working on different projects.
Using a framing nailer is an effective way to install Hardie siding quickly and safely with a professional finish. The advantages make it an essential tool for any DIY enthusiast or contractor.
Limitations of Using a Framing Nailer for Hardie Siding
For many homeowners, using a framing nailer to install Hardie siding is appealing. After all, it's a quick and easy way to get the job done. However, there are some limitations to using a framing nailer for this particular application. Here's what you need to know.
Depth Control:
When using a framing nailer, it isn't easy to control the depth of the nails. It can be easy to drive them in too deep, which can cause significant damage to the siding and weaken its structure. This also affects how properly secured the siding will be.
Holes in the Siding:
The framing nailer creates larger holes than a hammer and nail, affecting the project's aesthetics. Additionally, especially when fastening Hardie boards at joints, more holes are visible than in other tools with fewer nails.
Damage to Material:
Using a framing nailer for Hardie siding may cause chipping, splintering, and potential cracking due to improper handling or force applied during nailing. This can be a messy and time-consuming task to fix. In addition, the nails may not penetrate the material deep enough, leaving it loose and prone to falling off. This can also cause an uneven finish on the siding.
Factors to Consider When Using a Framing Nailer for Hardie Siding
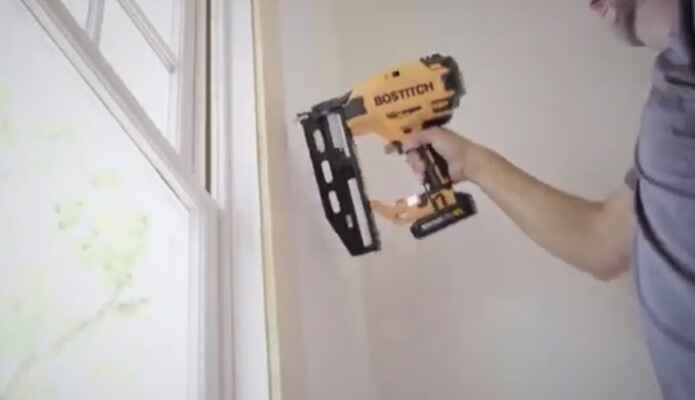
Installing Hardie siding requires the right tool for the job: a framing nailer. But with all the different models and features available, choosing the best framing nailer for Hardie siding can be challenging. Here are six factors to consider when selecting a framing nailer for your Hardie siding installation.
1. Power Source: Electric vs Pneumatic
Electric models offer convenience and portability but may lack power. Pneumatic models are more powerful but require an air compressor. Choose the one that meets your needs. Be sure to check if extra tools are required.
2. Nail Type: Straight vs Angle
Straight nailers drive nails in a straight line, while angle models permit angled nailing with precision. Consider the size of the nails and the type of siding used when deciding. Be sure to check the nail gauge and type of nails required for your project.
3. Magazine Type: Coil vs Stick
Coil models hold more nails but require reloading after each shot. Stick models have less capacity but can be used for longer before needing to be reloaded. Choose the magazine type that best suits your project and time frame. Be sure to check if the nailer can accept both types of magazines.
4. Adjustability: Nail Depth & Exhaust Direction
Adjustable depth control allows you to drive nails flush with the siding, reducing damage and extending siding life. Also important is adjustable exhaust direction, which directs air away from the user for greater safety. Check if the nailer has these features before purchase. Make sure they are easily adjustable without tools or extra accessories.
5. Safety Features:
Contact trip lock prevents accidental firings, while dry-fire lockout eliminates firing empty nail strips. Be sure to check if these features are present in the nailer before purchase. Look for a tool that offers both safety and convenience.
6. Comfort & Convenience:
Ergonomic design and lighter weight reduce user fatigue and make it easier to handle the tool for longer periods. Check how heavy the device is and its overall shape and design before making a purchase. Choose one with rubber-coated handles for maximum comfort during use. Make sure the power cord length is sufficient to complete your project.
Tips for Using a Framing Nailer on Hardie Siding
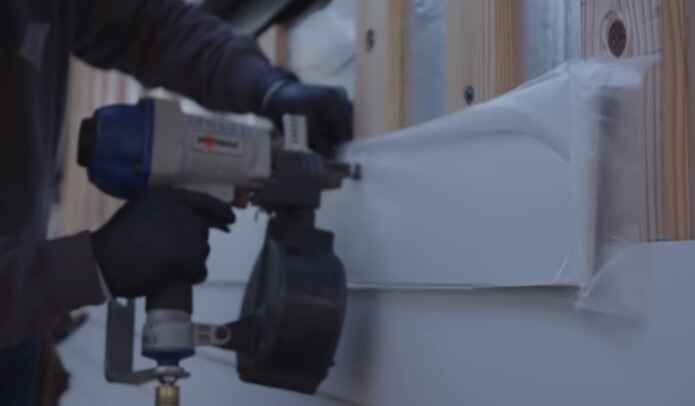
Getting the job done right on your first attempt is easy by using the right tool. A framing nailer is an excellent choice when installing Hardie siding, allowing you to quickly and accurately secure your siding to the wall. Here are our top tips for using a framing nailer on your Hardie siding project.
1. Choose the Correct Nails
Using a framing nailer on Hardie siding, use corrosion-resistant nails with 0.113-inch shafts. This will help ensure a secure fit and will help keep your siding looking great for years to come.
2. Consider the Weather
When working with any type of siding, it's essential to consider the weather. If it's too hot or too cold, the nails may not fit correctly in the material. It's best to install Hardie siding between 50 and 90 degrees Fahrenheit.
3. Use the Right Technique
When driving nails into your siding, hold the gun at a 90-degree angle to the surface. This will ensure that the nails are driven in correctly and won't cause any damage to the siding.
4. Pay Attention to the Gap
When installing the siding, leave a 1/8-inch gap between each board. This will help ensure that your siding can expand and contract with temperature changes and won't warp over time.
5. Keep it Clean
Be sure to keep the area around your Hardie siding clear of debris, such as sawdust or dirt. If these materials get into the grooves between boards, they can affect the fit of your siding and cause damage over time.
Following these simple tips will help ensure that your Hardie siding project is a success.
4 Alternative Methods of Installing Hardie Siding
Installing Hardie Siding is a great way to add value to your home. Several alternative installation methods can be employed depending on the desired outcome.
Hand Nailing
This method requires nails to secure the siding and offers a more finished look after completion. The nails must be spaced correctly, and the siding must be firmly placed when nailing. This method is labor-intensive and time-consuming but provides a more secure and aesthetically pleasing result.
Stapler
Using a stapler to attach Hardie Siding can significantly reduce the installation time compared to hand nailing. The stapler must be loaded with the correct type of staples and used at the correct depth to ensure a secure fit. This is an effective way to complete a large project in a short period.
Screwing
Screws should be spaced 6-8 inches apart. Use a level when installing the first course of siding to ensure that succeeding courses are level. It is important to predrill holes for the screws to avoid splitting the boards.
Gluing
Construction adhesive should be applied to the back of the siding board before installation. Care should ensure the adhesive does not come into contact with painted surfaces. The boards should be lightly tapped until the adhesive is cured for a secure, watertight seal.
Final Words
If you are wondering whether or not you can use a framing nailer for Hardie siding, the answer is yes. This type of nailer is specifically designed to be used with this material, making your job much easier. With the right tools, your job will go smoothly, and you'll be able to get the results you want.