To clamp wood to a sawhorse, position the wood on the sawhorse and use a woodworking clamp to secure it tightly. Ensure the clamp is placed evenly to prevent wobbling during cutting.
Unlock the world of woodworking with our beginner-friendly guide on 'How to Clamp Wood to Sawhorse.' Whether you're a novice or just starting your DIY journey, securing wood to sawhorses is a fundamental skill. In this step-by-step tutorial, we break down the process into simple, easy-to-follow instructions. From choosing the right clamps to ensuring a stable work surface, this guide is your go-to resource for mastering the basics. Let's dive into the essentials and elevate your woodworking game!
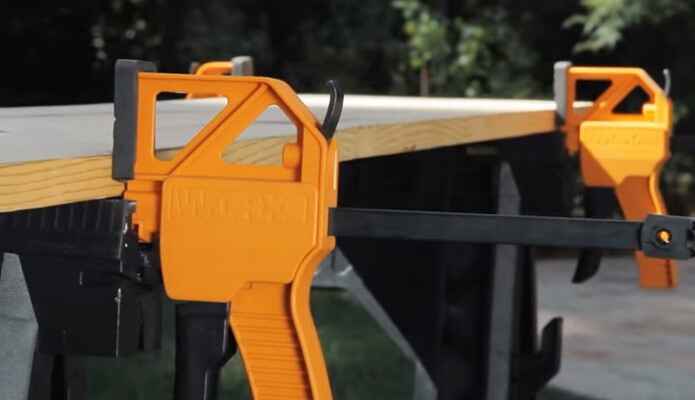
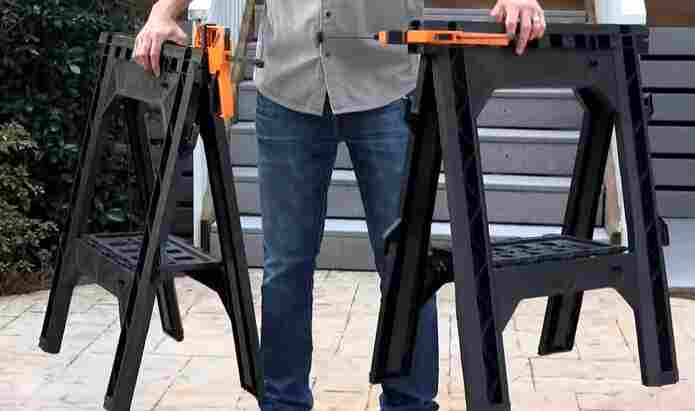
Using clamps to secure wood to a sawhorse is appropriate in various situations, primarily when you need to stabilize the workpiece to ensure safety, accuracy, and ease of cutting, sanding, or other woodworking tasks. Here are some scenarios when using clamps with sawhorses is advisable:
1. Cutting long or heavy boards:
When working with long or heavy pieces of wood that might be difficult to balance or hold steady by hand, clamping them to sawhorses prevents the material from moving unexpectedly, reducing the risk of accidents.
2. Precision cuts:
For tasks that require precise and accurate cuts, such as when using a circular saw, miter saw, or table saw, securing the wood with clamps helps maintain control over the workpiece and minimizes the chance of the material shifting during the cut.
3. Safety concerns:
When cutting or working on wood that is prone to splitting or has a tendency to move, clamping it securely to the sawhorses enhances safety by preventing kickback or unexpected movements.
4. Sanding or finishing:
If you need to sand, paint, stain, or finish a piece of wood, clamping it to sawhorses can keep it steady and at a comfortable working height, allowing you to apply even pressure or coatings smoothly.
5. Assembly work:
When assembling various pieces of wood or working on a project that involves joining components together, clamping the parts to sawhorses can help you maintain alignment and stability during assembly.
6. Freeing up your hands:
Using clamps to secure the wood leaves your hands free to operate tools or make adjustments without constantly holding onto the workpiece.
By using clamps with sawhorses in appropriate situations, you can work more safely and efficiently on your woodworking projects.
How to choose the best clamps for securing wood to a sawhorse?
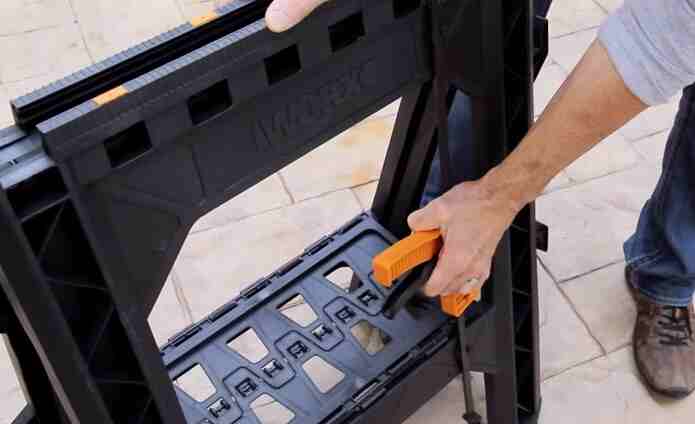
Choosing the right clamps for securing wood to a sawhorse is important to ensure safety, stability, and efficiency during woodworking projects. Here are some steps to help you choose the best clamps for the job:
1. Determine your project needs:
Consider the size and weight of the wood you'll be working with. Different clamping methods and types of clamps are suitable for various tasks.
2. Choose the clamp type:
There are several types of clamps available for woodworking, each with its advantages and uses. Some common types include:
- Bar Clamps: These clamps have a long bar that provides a wide clamping surface, making them suitable for securing large pieces of wood to sawhorses.
- C-Clamps: These are versatile and come in various sizes. They are excellent for holding smaller pieces of wood securely.
- Quick-Release Clamps: These clamps are easy to use and adjust quickly, making them ideal for tasks where you need to reposition the wood frequently.
- Pipe Clamps: These clamps use a length of pipe as the bar, making them adjustable to various lengths. They are great for clamping longer pieces of wood.
3. Consider the jaw width and depth:
Ensure that the clamps you choose have jaws wide and deep enough to securely hold the thickness and width of the wood you're working with.
4. Check the clamp's maximum clamping capacity:
Make sure the clamps you select have a maximum clamping capacity that matches or exceeds the size and weight of the wood you'll be securing.
5. Look for quality and durability:
Invest in clamps made from high-quality materials, such as steel or aluminum, for long-lasting performance. Check for sturdy handles and reliable locking mechanisms.
6. Consider ease of use:
Choose clamps that are easy to operate and adjust. Some clamps come with quick-release mechanisms or one-handed operation, which can be very convenient.
7. Think about compatibility with your sawhorse:
Ensure that the clamp design and size are compatible with your sawhorse. Some sawhorses have built-in clamping features, while others require separate clamps.
8. Read reviews and seek recommendations:
Before making a purchase, read product reviews and ask for recommendations from experienced woodworkers or online forums. This can help you choose clamps that have a good reputation for woodworking tasks.
9. Budget considerations:
While quality is important, consider your budget. There are quality clamps available at various price points, so choose the best option within your budget.
10. Test the clamps:
Visit a local hardware store to physically examine and test different clamps to see which ones feel comfortable and suitable for your specific woodworking needs.
By following these steps and considering your project requirements, you can choose the best clamps for securing wood to a sawhorse and ensure a safe and efficient woodworking experience.
How to clamp wood to a sawhorse?
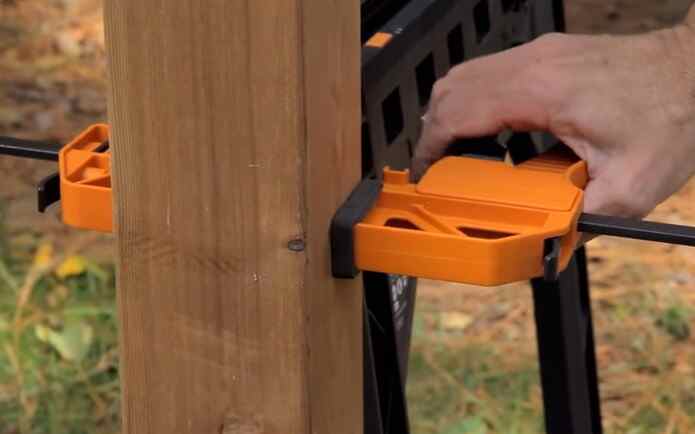
Clamping wood to a sawhorse is a simple but essential skill when working with wood, as it provides stability and safety during cutting, sanding, or other woodworking tasks. Here's a step-by-step guide on how to clamp wood to a sawhorse effectively:
Materials and Tools You’ll Need:
- Sawhorses
- C-clamps or bar clamps (large enough to fit around the sawhorse and the wood)
- Woodwork project piece
- Safety gear (safety glasses, hearing protection, etc., as needed)
Step-by-Step Instructions:
1. Set Up Your Sawhorses:
Ensure that your sawhorses are stable and level on a flat surface. Make sure they are properly spaced to support the length of the wood you're working with.
2. Position the Wood:
Place your woodwork project piece on top of the sawhorses, aligning it as needed for your specific task. Ensure it's centered and balanced on the sawhorses.
3. Choose the Clamps:
Depending on the size and weight of your wood piece, choose the appropriate clamps. C-clamps or bar clamps are commonly used for this purpose. The clamps should be large enough to span the width of the sawhorse and grip the wood securely.
4. Align the Clamps:
Position the clamps on either side of the wood piece, close to the edges but not so close that they interfere with your work. Make sure the jaws of the clamps are facing outward and can grip the wood.
5. Adjust the Clamps:
Open the clamps wide enough to fit around both the sawhorse and the wood. You may need to adjust the clamp's throat depth to ensure a secure grip on the wood.
6. Clamp the Wood:
Place the clamps over the wood and sawhorse, making sure they are centered and aligned with the wood. Tighten the clamps by turning the handle or using a wrench, depending on the type of clamp you're using. Apply even pressure on both sides to prevent the wood from shifting.
7. Check for Stability:
After clamping, give the wood a gentle shake to ensure it's securely held in place. Make any necessary adjustments to the clamps if the wood is not stable.
8. Safety Precautions:
Before you start working, make sure your wood piece is firmly clamped and won't move during your woodworking task. Always wear appropriate safety gear like safety glasses and hearing protection as needed.
9. Begin Your Woodworking Task:
With the wood securely clamped to the sawhorse, you can now safely start your cutting, sanding, or other woodworking activities.
Remember always to prioritize safety when working with wood and power tools. Properly clamping your workpiece ensures stability and reduces the risk of accidents or injuries.
What are some tricks for clamping wood to a sawhorse?
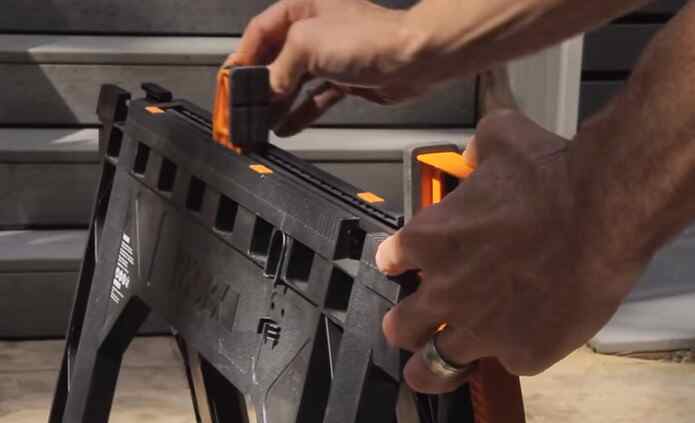
There are a variety of tricks you can use to clamp wood to a sawhorse. Here are seven of the most popular:
1. Use a quick-release clamp:
This is probably the most common and straightforward way to clamp wood to a sawhorse. Attach the quick-release clamp to the sawhorse and tighten it down on the wood piece you're working with.
2. Use a C-clamp:
If you don't have a quick-release clamp, a C-clamp will work just as well. Just be sure to position the C-clamp, so it's not in the way of your sawing or sanding.
3. Use G-clamps:
G-clamps are similar to C-clamps but have the added benefit of griping round objects like pipes. This can come in handy if you're working with oddly shaped pieces of wood.
4. Use a vise:
A vise is another excellent way to clamp wood to a sawhorse. Ensure the vise is secure and will not slip during use.
5. Use ratchet straps:
Ratchet straps are often used to secure cargo on trailers, but they can also be used to clamp wood to a sawhorse. Just be sure that the ratchet straps are tight enough not to slip during use.
6. Use rope or twine:
If you don't have clamps, you can always use rope or twine to tie the wood piece down to the sawhorse. Just be sure that the rope or twine is tight enough not to slip during use.
7. Use weights:
Another option is to place weights on the wood piece you're working with. This will help to keep it in place while you work.
These are just a few of the many ways that you can clamp wood to a sawhorse. Be creative and try out different methods until you find one that works best for you and your project.
Final Words
If you need to clamp some wood but don't have a traditional vise, sawhorses are a great option. Following the steps above, you can easily and quickly set up your makeshift vise that will secure your material while you work. This method is particularly useful when working with larger pieces of wood that won't fit in a standard vise. So, give this method a try the next time you're looking for an alternative way to clamp your material.